Monday, April 18, 2016

Craft Island Reveal


I am so beyond excited to have my vision come to life for my new craft room.  I cannot wait to finish unpacking in here now and get busy using this beautiful new crafty space. What's more is my husband and I did it ourselves, I am feeling so proud! And very grateful that I could tell my husband my ideas and he could help me bring it to life.

I need to look for some more pink tubs to fill this side, but these will work for now.  I love having my paper cubes along the sides.... Everything is right at my fingertips :)

Did you notice my wonderful cutting mat tabletop?  this is what inspired this whole project lol.  My son got me this mat several years ago and I always had it on my big oak L shaped desk but that desk would not fit right in this room so it had to go to my Hubby's office and I needed to come up with a new idea for my new room to hold this mat.  When I dreamed up this idea, I had no idea it would come out this good.

And do you notice my can organizer?  I made this several years ago and it always sat on my desk near me but now it is even better because I now have it on a turntable that I salvaged from my microwave that recently bit the dust.  The idea came to me to drill a spot for it on the island so I asked hubby and he said yeah no problem.... Eeeeeek!  Happy girl right here!  If you want to see how I made my Can organizer you can find that old post here:  Pretty tin can organizer

Plus I can move it and pull out the spinner wheels if I need to work on measuring or cutting something large on my mat.  I so love being able to up-cycle things especially when they become such a wonderful asset to my work space.

ok well I have much unpacking to get to and I am in the middle of making a card so I better get to work.  Thanks for stopping by to check out my new Craft Island.  I hope to make a walk-thru video of my new Craft room and some of the ways I have found to organize and a few more up-cycles to share with you all when I get it finished.  As always, I wish you a happy and crafty day!

~ Eva ~

Sunday, April 17, 2016

sneak peek of my new craft room


Here is the sneak peek of my craft room I promised to share with you all.  For those of you that don't know we bought a home and moved recently.  I am in love with our new Home and made sure to take the time to put the rest of the house together before I started on the craft room.  We have been spending a lot of time on the yard too so it has taken me awhile to get in here.  As soon as I checked out the house and fell in love with it.  I visually started placing things in here for my craft room.  I had many visions of grand ideas lol.  So now the time has finally come to make my biggest vision into a reality! 

up on blocks so I could paint the crossbars black to match the cube shelves, I added pink card stock to the backs of  any open cubes after i put them together.  top will be white with mat on top and the lower shelf will also be white.  I will then tuck two white paper cubes on either side underneath.
We are in the process of building my crafty work island in the center of the room.  I am loving it already and can't wait to get it finished so I can finish unpacking my crafty supplies and get back to crafting.  My son gave me a wonderful large cutting mat a few years ago.  It used to be on my huge Oak L desk but the desk wouldn't fit in this room without over crowding so I gave the desk to my husband to use at his office.  The large Cutting Mat however will be placed on the top of this work island to become the entire work surface. 

I also have an up cycle idea in the works as well if my hubby can make it happen I will be one happy girl.  I will share that with you if it all works out and fingers crossed because it will be an amazing functional addition for me.

cant wait to show you all a full walk thru with my room is complete.  Thanks for stopping by and I wish you all a wonderful and crafty day.

Eva Scraps

Thursday, April 14, 2016

Awesomeness Thank You Card

Oh my gosh!  It has been a huge long break from crafting for me.  We bought a house and moved and I wanted to get the rest of the house pretty well done before I came to start my craft room.  Over the last few days I have been arranging things and getting somewhat unpacked in here finally.  I have a center island work station planned but now have to wait on hubby to help me make that happen.  I couldn't wait any longer on crafting though, I have been having major craft withdrawals!!!  I have enough unpacked to make a card or two so that it what I spent this morning doing. 

I had so much fun with this card, oh how I have missed my creative time!  I started out using one of Mary's new card Sketches from over at  Cardz TV.  I chose to use Sketch #4 for this pretty little card.  I used paper scraps from an Authentique stack called Classique:  Pretty.  The hounds tooth pieces I altered by blending color all over with a pink pigment ink from stampabilities and using a Tim holtz blending foam.  the card base is just a plain white cardstock cut to make an A-4 size card.  The first(bottom Layer) is a solid light pink recollections cardstock.  I love this new Stitched Shapes Bundle I got from Simon says stamp and used the large stitched rectangle for this layer then added a layer of designer paper onto that.  then I added a 1" strip of pink with a 3/4" strip of hounds tooth.  the beautiful opulent oval it from spellbinders along with the next layer of hounds tooth designer paper.  for the flower I used several dies and materials.  The bottom flower layer is cut from a scrap of  glimmer pink handmade paper I won many years ago... I love that paper!  then I used some of the same papers already being used on card, all of those flower layers were cut from spellbinders jewel flowers dies.  the top flower layer is from HOTP Bodacious Blooms die and is cut from a pretty patterned white vellum.  I inked all the flower petal edges with the same pink ink as I blended with earlier.   I added some clear dew drops and colored over them with one on my pink spectrum noir markers.  The small sentiment frame is also from Spellbinders from a set called twisted metal.  The thank you stamp and the inside sentiment stamp "is there any limit to your awesomeness!" are both from HOTP Thank You stamp Set.

For the inside along with that adorable sentiment stamp I again used that large stitched Mat and I also made some stitched flags playing around with that set.  I added the extra pieces to form the opposite twisted metal frame to add on top of the flags.  I also cut one more jewel flower with a couple of assorted dies layered on top. 

and the cute envelope I added a strip of hounds tooth and some varying cuts of star flowers from a spellbinders set.

I am entering into these fun challenges:
Simon Says Stamp - Monday challenge - Spring or Flowers
Jo's Scrap Shack -  Fun~day Friday Challenge #133 - Anything Goes
HIMCR - #246 Super Scraps Saturday
Die-Cut Divas - April - Spring Flowers
DL.Art - Thankful Thursday - Water or Thank You

Thanks for stopping by to see me latest project.  I hope to add some peeks of my new craft room soon too.  Have a wonderful and crafty day!
Eva Scraps

Tuesday, December 15, 2015

Guest Diva - Merry Christmice Card

I really wanted to use my new stamp set Janie's Mice Christmas from HOTP for my Guest Diva Spot at Die Cuttin' Diva's this week.  I love entering their fun challenges and hope my card will inspire some of you to join in this weeks Christmas Challenge.


Pattern Paper Stack - Pebbles.com welcome Christmas
Spellbinders Build a wreath
   (Layered w foam tape & used white ink to embellish edges and thru die)
Cricut Mickey & Friends - Mickey (page 108) cut at 2 1/2"
Cricut Pooh & Friends - Santa Hat (page 60)
Elegant Edges - Scallop Border (page 26) cut at 4"
Elegant Edges - Oblong Tag (page 38)
From Paper Stash (DT) - Red Foil strip cut at 4" x 1/2"
HOTP - Janie's Mice Christmas Stamp Set for Sentiments and Cheese Present
Plus added Buttons, Bling, Ribbon and twine from stash and inked edges.
Used Spectrum Noir for coloring and a red Sharpie for the Bling Gems


Thursday, December 10, 2015

Only 2 days left to enter

Hey to all of my Crafty Friends in the USA
Don't miss out on this awesome giveaway from Scrapbook.com
Only 2 days left!!!!
Get entered to win this massive giveaway!
 
https://gleam.io/ZKUOb-8RZNcJ


Wednesday, December 9, 2015

Football Birthday Card

Hello Crafty Friends, boy was this hard for me!!!  I don't know why simple and clean cards are sooooo hard for me to make oh and masculine one at that.  This Card is for our Teenage Grandson so it really needed to stay simple and masculine for him.  It took me all morning but I achieved it... finally lol

I knew I wanted it to be a football card of some sort because this is his first year in Football and he is so dang good that he got chosen to move up to the Varsity team at the near end of the season (he is a Freshman) So Huge accomplishment that he has worked hard for.  So as you see it had to be a football Card!

The Background was a free Digi-image I found online that I just sized to fit my white A2 card as the smaller layer.  The Football is from Cricut Wrap it Up Cartridge.  Page 70 of the handbook.  and I ran it through my Tiny Bubbles folder on my cuttlebug to emboss before adding the white layers to the ball.  The sentiment is a Vellum piece that came just in time.  As I was making this card the doorbell rang and it was my latest Black Friday order from HSN.  The kit is called Hot Off the Press Complete Vellum Collection.  Wow, Love Love Love this kit!  Anyway as soon as I saw this this Happy Birthday Vellum sentiment in Red with hints of blue in the background I knew it would be perfect!  Our Grandson's Football Team colors are Red & Blue.  so I cut out the sentiment flag from the velum sheet and then  cut a larger flag shape from Kraft card stock to make a shadow behind it.  I added a blue Brad on either side of the sentiment and Voila. 
For the inside I cut a piece of green cardstock as a mat for the smaller white layer that I inked the edges in Tim Holtz Walnut Stain.  I cut a strip of the stripe vellum that matched the background sentiment flag on the front of the card.  I stamped 2 sentiment stamps from different companies to get it to say what I wanted....
Hustle, Hit, NEVER quit!  is from Scrappy Moms set called Game Day
Happy Birthday Stamp is from Craftin Desert Diva's set called Happy Celebrations
Both are stamped in the Tim Holtz Walnut Stain Distress Ink

I will be entering into these fun challenges:


Thanks for stopping by and Happy Crafting!  ~ Eva Scraps

Tuesday, December 8, 2015

Vellum Oval Roses Card

Oh My Gosh, let me start off by telling you how much I love this new HOTP Vellum Kit I just got from HSN. Wow wow wow!!!  So I Created this Birthday card for my Sister/Mom (She Raised me when my Parents Passed) and I love the outcome!
I used a Blue Cardstock for the Background Layer on my White card base.  I then added a layer of pattern paper from Colorbok Rosewood Stack and inked the edges in blue.  The entire center focal consists of 3 pieces. The Beautiful colorful Vellum Layer which I cut out and then backed it with a white cardstock layer to make it pop more cut to the same frame shape.  I then added the beautiful Black Coordinating Dazzle onto the oval and Rose and WOWZERS!!!  I am in love with this focal, can you tell?  hahaha  To Finish off the front I simply Stamped The Birthday wishes Sentiment stamp from a set in my stash I believe was from Cardmaker... anyhow I stamped it in versamark and heat embossed with Zing Black glitter embossing powder. 
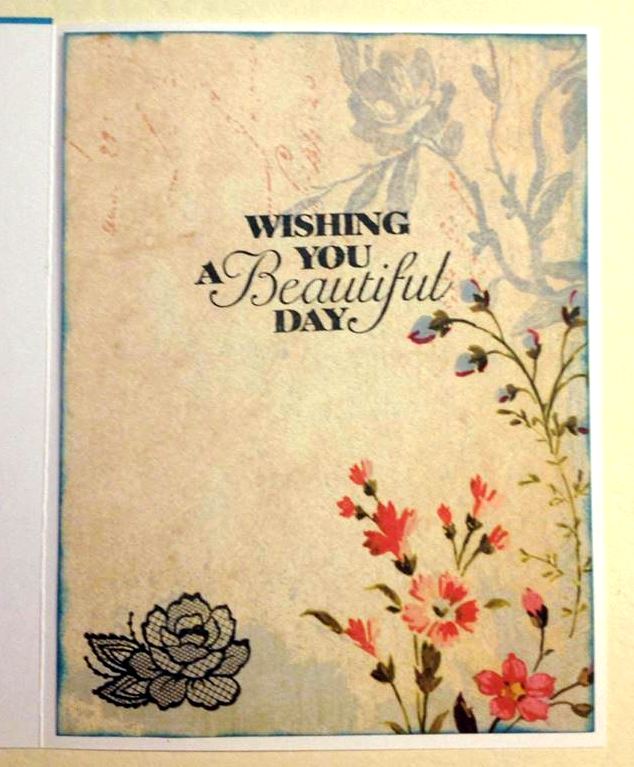
For the inside I used more from the same pattern paper sheet and stamped the sentiment and also the pretty rose in the bottom left corner in Memento Black tuxedo ink from the HOTP stamp set - Artful Affirmations.  I hope she loves this card as much as I do.  <3 
 
Thanks so much for stopping by today to visit my blog and see what I am up to in my Crafty Cave.  Wishing you all a beautiful and Crafty Day! 
~Eva Scraps
 

Saturday, December 5, 2015

Purple Snowman Tags

More tags I created using the Cricut Very Merry Tags & Just Because Cards Cartridges along with my Frosty Forms Die Cuts
For the base I used a tag cut from Cricut Very Merry Tags cut from Recollections light purple Cardstock.  The pattern paper layers are from my scraps that I cut down to fit and used my WRMK corner chomper to round the top corners.  the bottom Scallop came from Cricut Just Because Cards... Perfect for my sentiment from my brand new HOTP Christmas Collection set  stamped in Memento Tuxedo Black ink.  The cute little Snowman is from Spellbinders Frosty Forms die set cut from White Card Stock.  The bow is cut from some purple pattern paper along with the little over sized hat I cut from SCAL2.  I used Purple Glitter glue to enhance the hat.  I embossed Snowman and inked with blue ink.  I also put some purple sequins from my stash at the bottom on either side of the sentiment and added a drop of Purple Glitter Glue to cover the hole on each.  I ran a  sheer Light purple ribbon through the top for hanging it on a gift.

 I am entering into these fun challenges:

Friday, December 4, 2015

Birthday star card

I made this card for one of my Brothers and didn't want to fight myself to keep with the simple and masculine theme, as I always like to go over the top!!!  So I created this card with a fun Cardmaker's Instant Card Art kit from HOTP called Jewel Colors.  It is filled with fun Ready made die-cuts.  was fun to figure out which papers to choose from my stash and just put this card together quick and easy :)
I used a white 5.25 X 6.50 card base, I added a layer of Dark Blue Cardstock and then a layer of Pattern paper that I picked up from Paper Wishes a while back.  I then added my Die-cut elements from the kit, but first I inked the edges of each piece with a dark Blue Ink.  I took the border strip from the kit and adhered it to the Birthday sentiment tag.  I then added a Light blue brad and metal flag to each side of the sentiment tag from my stash.  I decided to go ahead and add a larger brad of the same color to the top of the sentiment tag.  I then glued the 3 stars onto the bottom area of the card. 

For the inside I cut strips of the same papers I chose for the front of the card, inked the edges in blue and added some more die-cut elements from the kit.  I have two more December Birthday cards to create for 2 of my other Brother's this month.  I better search thru my other kits as I really struggle with simple masculine cards for some reason!  Oh and the fact I have 9 Brothers, you would think I could do these with ease by now!!!
Entering into these fun challenges:
Simon Says Stamp Monday Challenge: Gentlemen

Thanks for stopping by to look at my card.  I hope to see you again soon. :)

Reindeer Christmas Tags

I love tags and these were so fun to make.  I wanted to use up some of my recent scraps so these tags were born lol.
For the base I used a tag cut from Cricut Very Merry Tags cut from Recollections Red Cardstock.  the pattern paper layers are from my scraps that I cut down to fit and used my WRMK corner chomper to round the top corners.  the bottom Scallop came from Cricut Just Because Cards... Perfect for my sentiment from JustRite stamp set - Noel Christmas Ornaments set  stamped in Brown Stampabilities pigment ink.  The Beautiful Reindeer is from Spellbinders Frosty Forms die set cut from Kraft Card Stock.  the bow is cut from the same red recollections cardstock as the tag.  I embossed Deer and inked with brown ink.  I added some Red stickles to his nose.  I also put some red sequins from my stash at the bottom on either side of the sentiment and added a drop of red stickles to cover the hole on each.  I ran a red Grosgrain ribbon through the top and tied a red & white Twine bow around the base.  I also used Tim Holtz Walnut Stain Distress ink to ink the edges of my pieces.
 
I am entering into these fun challenges:
 
Thanks so much for stopping by, I hope you enjoyed my Christmas Tags. 
Happy Crafting ~ Eva Scraps