Saturday, September 27, 2014

Haunted House FB Challenge

If you are looking for Fall is in the Air Blog Hop Click Here - Or Please scroll down to the next post... Thank You :)

Hello my Crafty Friends.  Are any of you Building a 3-D Haunted House this year for Halloween Décor?  or maybe once you check out our group you will be inspired to build one.  I just wanted to invite you all to come build and post your 3-D Haunted House in our Facebook Challenge.  But we are also a sharing site of any Halloween or Fall related projects so come join in!!!

Join us here on Facebook
Halloween /Fall Group - https://www.facebook.com/groups/703866416342208/
Christmas/Winter Group - https://www.facebook.com/groups/708144405932204/


Me (Eva Scraps) and my Crafty friend Sarah Burton started a FB Group last Month just for that purpose!!!  Our little crafty group of Peeps have grown to 70 members already and continue to grow everyday.  When we started we wanted to help and encourage each other with the 3-D Haunted House Build and have grown into a fun crafty sharing place of Halloween and Fall Projects!!!

Would you like to create the 3-D Haunted House from maybe Cricut Happy Hauntings Cartridge?   Or you could use any svg file of a 3-D Haunted House.  I know SVG CUTS has a couple to choose from. 
Here is one I made of theirs from the Elmhurst Hollow kit.

I was very intimidated before I started this one thinking it was going to be so hard, but it was actually quite easy and I really had a good time with it.  Next on my to do list is the Happy Hauntings Haunted House.  I hope to get going on it this week... I have procrastinated this build for years.

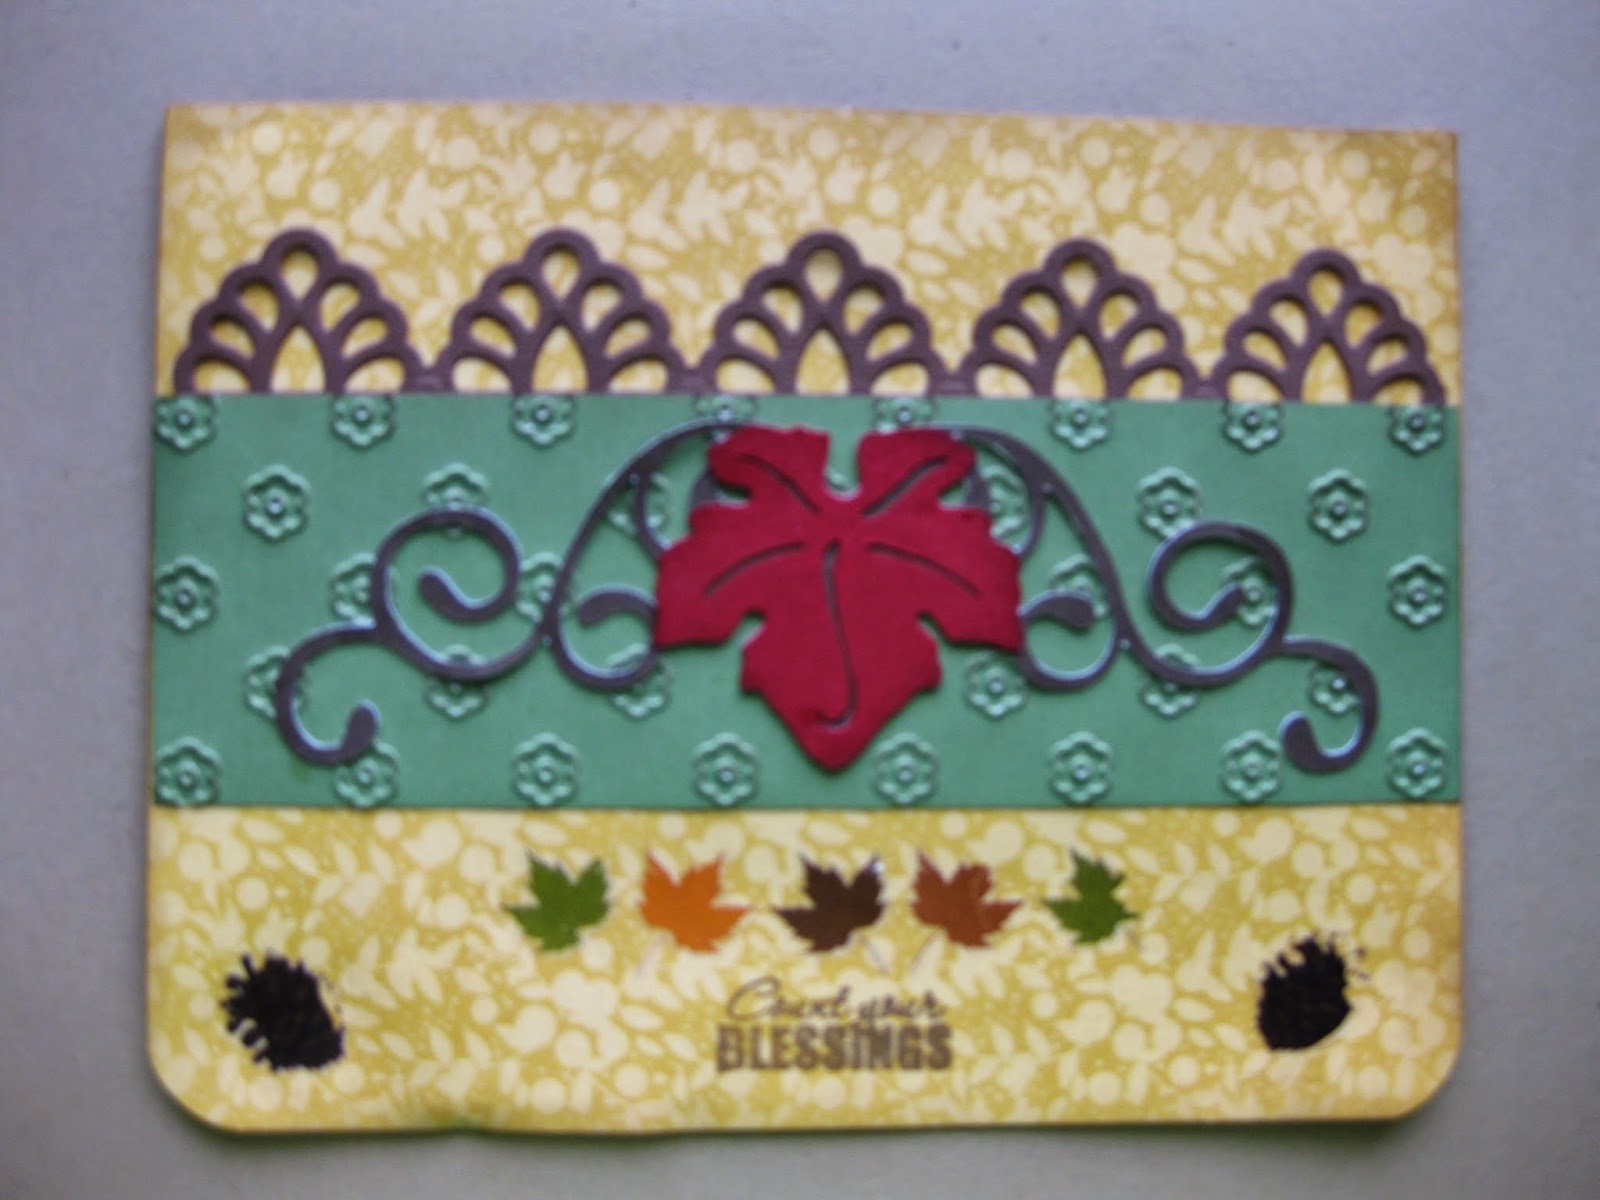
 Anyway, we would love for you to come join us on this challenge... There will be some fun Halloween and Fall Die cuts sent to one randomly drawn winner (US shipping only) from both Sarah and I following the challenge which ends on October 15th.  I will also be putting together a fun slideshow video of all entries, so take good photos of your house. It must be a 3-D build... no cards or layouts for this one... but we do encourage you to share any of your fun Halloween or Fall related projects in our group too... including cards and layouts.

Here are some great tutorial videos I found to help with the Haunted House Builds:


Cricut Happy Hauntings 3-D Haunted House (Mercy Tiara)
Part 1 of 2 - https://www.youtube.com/watch?v=nJhKOpffhHU
Part 2 of 2 - https://www.youtube.com/watch?v=ljAuQIdpJqg

Another tutorial for Cricut Happy Hauntings 3-D Haunted House (LDM Creations)
Part 1 of 2 - https://www.youtube.com/watch?v=gEFwwK0W-qs
Part 2 of 2 - https://www.youtube.com/watch?v=I7w05VYTQ2o

SVG CUTS - Elmhurst Hollow - Assembly Tutorial
https://www.youtube.com/watch?v=luNkXnD3M44


We hope you will come join in on the fun either to do the challenge or just to come and share your work and be inspired by others. 

We also have a Christmas sharing group as well and are running an elf challenge there that ends Oct 6.  come join in on that one or share your Christmas/Winter projects with everyone there... we are at almost 300 for that one woo hoo!!!

Christmas/Winter Group - https://www.facebook.com/groups/708144405932204/

 ~ Happy Crafting ~ Eva

Friday, September 26, 2014

Fall is in the Air Blog Hop


Happy Saturday
and
Welcome to this months Blog Hop
with
The Creating Blog Hops Cafe'
 
This month we have made some wonderful Fall projects to share with you. If you have just stopped by to visit with me, thank you and welcome, but please start at the beginning of the hop with our Hostess, Robin Lane with
 Create-A-LatteWe would not want you to miss any of these wonderful projects.
 
 
So, grab yourself a Latte', sit back and hop along with us as we share our projects with you.

For My Fall Project today I decided to make 3 Fall cards.  All of them have different elements from the Cricut Cartridge Thanksgiving for the main focal.  Each Card is size 5" X 6 1/2"   and all edges have been inked with Tim Holtz Walnut stain ink.


Starting with this Fall Leaf Card, I used a muted yellow pattern paper  of fall leaves for the background layer from my stash.  The second layer of Green Card stock embossed with CB 5X7 Flowers folder, cut at 2" X 6 1/2", tucked behind is a Border in Brown from the Spellbinders Moroccan Accents Shapeabilities die set.  atop of the green layer I have added a beautiful scroll Leaf for the focal from Cricut Thanksgiving cart... such an easy piece to cut and assemble consisting of only 2 layers but such a striking focal it becomes.  That one is cut at 5.5 wide, bottom layer brown and top leaf a deep red.  at the bottom of the card I used my corner rounder and added several leaf rub-ons and a couple of pine cone rub-ons.  I used an un-mounted rubber stamp for the Count your blessings sentiment, I think it came from a Card maker of the month kit.


This Pumpkin card is very similar with a deep orange topped with flocked wheat pattern layer, same Moroccan border, Pinecones are from a die cut sheet, Pumpkin Scroll focal is again from Cricut Thanksgiving cart and the sentiment is a rub-on atop of a spellbinders Fancy Tag 3. 


This Acorn card is again very similar with a green flower flocked background pattern paper and an Orange & Gold 2" foil paper layer, same Moroccan border at top, leaves at bottom are from a die cut sheet, Acorn Scroll focal is again from Cricut Thanksgiving cart and the sentiment Thankful is a rub-on atop of a frame die cut from my stash. 

 
This month we have a wonderful Sponsor, Lucy Kelleher with Close To My Heart, and she has a fantastic giveaway to share with you today. Lucy is giving away a $10 Gift Certificate to her store.


Close To My Heart


Your next stop will be with...

Miranda Enclade


If you get lost along the way here is the entire 

line-up of today's hop for you to get back on track and not miss a single project.
 
9- Connie with...     http://www.conniecancrop.blogspot.com

10- Jessica with...   http://www.craftinandstampin.blogspot.com


Thank you for hoping along with us today and I hope that we have inspired you to get your craft on.


Candy Corn Cutie Card


Hello again my Crafty Friends.  Today I have a Halloween card on the cuter side to share with you.
I wanted to do a fun colorful card to send to my Grand Kiddos this year and thought they may like this one.

This Adorable little Candy Corn Guy (I made mine a Gal) is from Pretty Paper Pretty Ribbons  I picked this file up this morning for only .79 cents... what a great buy!!!  I used  a Peachy Keen Wide Eyed Kids face stamp, instead of the face to cut with the file.  I used my white gel pen to color in the eyes, I used pink gel pen for tongue and red gel pen for the mouth.  I rubbed some pink chalk around to make her cheeks nice and rosy.  I put white Glitter on the shoes, gloves and white topper. 

I chose a black background to make it all pop that I ran through cuttlebug Swiss Dots.  The Chevron Paper is Recollection's and the Purple Dots  I can't remember, sorry and the shape for all of the layers is from SCAL 2 Basic shapes.  This was a very fun card to make.

I am entering in these fun challenges:

Cardz TV Cards Designer Challenge - #1 Polka Dots & Stripes

I hope you enjoyed my project today... leave me some comment love... I always read them :)  Also,  I hope you can stop by tomorrow to see all of the projects I made for our Fall is in the Air Blog Hop there is a sweet prize up for grabs for you crafty peeps.. so come on by :)

Thursday, September 25, 2014

Give Thanks Swirl Leaf Card


Back again, wow I am on a roll this week :)  Today I am sharing a Fall Card I made Using the sketch over at Fantabulous Cricut for the Challenge this week.  I love Sketch Challenges!!!

This card is a 5" X 5" in size.  I used these fabulous Handmade papers for the Cream layer and the ripped piece for the sentiment.  I think that it gives such a warmth to the card... perfect for Fall.  I was going to use gold or brown brads for the corners, but then I dug around in my stash and found these beautiful glass half circles in the perfect colors to use  The give thanks was stamped with Brown Stampabilities pigment ink onto this thin handmade paper that is perfect for tearing. I layered the soft muted polk-a-dot paper onto a dark brown layer to give it definition. I added some hand cut flags off to the side in a variety of fall papers from my scraps.  I then used my awesome Sew Easy Tool for the first time ever and stitched some brown and white twine through the card layer and the flags.  then I added a Fall leaf from Cricut - Gypsy Wanderings with the holes removed so it was in a blackout state in a deep almost maroon red card stock and ran it through my cuttlebug Swirls folder and then added a shadow layer behind it in Kraft card stock.  All of the paper on this project were inked on the edges with Tim Holtz Walnut stain ink.  Oh I almost forgot... I tied some raffia from my stash around the leaf stem and the leaf is popped up with foam squares.

 On the envelope I grabbed a different leaf I had laying around and I used it as a stencil and just rubbed my inking tool all around the edges and moved the leaf and repeated a few times.  I never added more ink to tool just simply rubbed around what was left over of the walnut stain on my foam pad to give it a very light muted look.

I am entering into these fun Challenges:
 Fantabulous Cricut - #229 Sketch
Die Cuttin Divas - Fall is Here
Craftin Desert Divas - Fall Linky Party
DRS Designs - Leaf it to me
Simon Say Stamp - Anything Goes 
House that Stamps Built - Fall 
Simply Create Too Fall/Autumn
Let's Craft And Create - #97 Autumn

Thanks for stopping by to have a look at my project... Hope you leave a comment... I love to read them.  Have a Crafty Day ~ Eva

Wednesday, September 24, 2014

Banner Birthday Day Cake

I made this Birthday Cake for my Hubby to match the card I made and posted yesterday.  I am not a cake decorator by any means so I thought how can I make it cute with paper décor... This is what I came up with using all of the same papers I used on his card and envelope...


The Banner is made from a My Scrap Chick Flag Banner File and letters are Sizzix Bubble Alpha cut with big shot ... the stars are cut from Cricut Birthday Bash Cartridge in 2 layers ... the back Kraft paper layer is 2 inch and top blue layer cut at 1 3/4" ...for the picks the scallop circles and layered Circle (HOTP) are cut on my big shot, letters are cut in SCAL 2 with font AR CENA.  All embossing is done with Cuttlebug squares from Simply Charmed set. 

I am entering into these fun Challenges:
Hiding in my Craft Room - # 166 Banners

Thanks for stopping by, I hope you enjoyed my Project :)  ~ Eva

Tuesday, September 23, 2014

Blue Masculine Birthday Card

I worked on a Birthday card for my Hubby following this weeks fun sketch over at Mojo Monday


I am very pleased how it turned out.  I used different Blue & Brown coordinating papers from My Minds Eye - Bohemia stack on the brown Kraft Paper.  I wrapped some sew easy twine around one layer with a fun blue button to top it.  The stamped images or heat embossed.  The fancy square frame is in a metallic bronze embossing powder and the Happy Birthday sentiment is in a gloss black embossing powder, both stamps are from Paper Wishes Stamp and Punch Stamp set.  I love this set and want to get their similar set in the Christmas style too!  I added 3 small blue brads above this layer and then added a couple of pennant flags I made out of Kraft card stock off to the side to complete the sketch.  I embosses those with Cuttlebug Squares from the Simply Charmed set of folders.  I also inked all of the edges of all pieces with Tim Holtz Walnut Stain Ink.

I am Linking this card to these fun Challenges:
Mojo Monday - 364
City Crafter Challenge Blog - Focus on Sentiment
Creative Card Crew - Twine


The inside is a printed message from my computer on blue paper that I also inked the edges with Tim Holtz - walnut stain ink.

Envelope made on my awesome We R Memory Keepers Envelope Punch Board out of Kraft Card Stock with some of the same pattern papers to embellish.  I stamped with same Happy Birthday Stamp... This time I just used Black Staz On Ink :)

Thank you all for stopping by... I hope you enjoyed my project today... I Love to read your comments ... So Please leave me one :)


Saturday, September 20, 2014

Got Candy? Monster card

Hello my crafty friends.  Today I want to share a card I made for the Peachy Keen Challenge going on right now.  it is a choice of things this time...  The sketch, the color palette, the photo for inspiration, OR any combo of them!  I chose to do the Sketch, the color palette and the photo inspired Halloween thoughts PLUS... I used some of my fun Peachy Keen Stamps!!!


On this card I went out of my realm as I hardly ever use stamps and color them in (digi or regular) ... I do not have the pens so I simply used my water color pencils and a water brush for the image.  I used one of my new Spellbinder's Dies (Labels 10) for the oval to cut him out and another Spellbinder's Die for the sentiment Banner ( Ribbon Banners) ... the sentiment is printed.  I used some fun Halloween paper that went with the color palette, Hmmm sorry not sure where it came from.   I added some fun drippy goo squishing out from under it (Martha Stewart punch) I popped up a fun fancy button I had printed from a digi scrap kit then cut it out with my scan n cut.  I then layered 2 real buttons on top of it with a bow of twine tied through them both.  and last but sure not least I stamped 2 adorable Peachy keen Pumpkin Faces (PK-552 Cut-out Pumpkin Faces) I didn't color them in as I wanted them to have a ghostly appearance popping out of the paper and I also decided to use some fun googly eyes on them to make them pop with the same green as what is in the color palette for the challenge.  I had lots of fun with this card, thanks for the fun challenge PK!!!

Entering into these fun Challenges:
Peachy Keen Challenge 14-13  - I used all 3 Sketch-Photo-Color Palette plus my PK Stamps
Little Scrap Pieces - Show it off Saturday Linky Party
Hambo Hoedown - It's all about kids
Die Cut Diva's - Something New
Cuttlebug Mania - Anything Die Cut


oh and here is a look at the inside.  I printed the sentiment out and cut a square and added some of the same papers as I did on the front to frame it and decided a little more goo would be fun!

I hope you enjoyed my project and would love to read your comments so if you are stopping by to view please leave one and thank you in advance :)  Crafty Hugs ~ Eva

Saturday, September 13, 2014

Fall Blog Hop September 27

Hello to all of my crafty friends... Wow I have not been here to my blog for far too long.

I will get busy posting things again... With our upcoming move and my time on FB I never seem to have time... I will be making time though, lots of projects to be made in the upcoming months!!!


I wanted to invite you all to a fun Blog Hop I will be in at the end of this month welcoming in our Beautiful Fall Season.  I hope you can hop with us... there will also be prizes available... I hope to see you then and feel free to share with your friends!!!  :)