Saturday, December 4, 2021

Glitter Foil Snowflake Center Step Card

I was so in love with the recent Glitter snowflake card that I made last week I got this fabulous idea to recreate it in a step card style and give a whole new look and I am so very happy with how it turned out!

I made a Center Step card big enough to handle the create a card die cut panel... it sticks up higher than the card base but that works out fine.  The card when folded is pretty large 6" tall X 6 1/2" wide so I definitely need to make my own envelope for it lol.  

For the center panel I cut the card front die out of the light purple glitter sticker paper that I had adhered to cardstock first.  I then cut a smaller square of dark purple glitter paper using the same process but I just cut it big enough to fit around the large snowflake that I wanted to layer and ran through big shot again.  I then took my scissors and cut away everything around that snowflake.  Then I attached it in its place on top of the light Purple.  I then attached it to light blue designer paper and added the silver foil frame on front.  I realized that it needed a solid white cardstock backer behind entire panel so you can't see through the top portion....I then mounted the entire panel centered on the card front.  For the sides I cut 2 of the Ornament panels in dark purple glitter, backed them with the same light blue designer paper and then cut them down on the bottoms to fit the card.  I cut 2 of the embossed Ornaments from light purple glitter and then I backed with silver foil.  oh yeah, I trimmed of the bow tops that cut with the ornament and added a small bow die cut from dark purple glitter paper.  I also added a glitter enamel dot (YNS Gumdrops) to the center of each tiny bow that was originally glitter white that I colored with my spectrum noir LV3.   I also cut a different smaller snowflake from the light purple glitter cardstock and attached it only in the center of the big dark purple snowflake so it could be more 3-D and added an enamel glitter dot (YNS Gumdrops) that was originally lavender that I colored with my spectrum noir LV3.  I cut the Merry Christmas word from Dark purple Glitter paper as well.


Side view
Close up of how I trimmed the bottom corners of the card away with my scissors along the two ornaments to give it an even more unique card shape.

Colored Gumdrops from YourNextStamp.com

For the inside I used the same light blue designer backing paper from the front.  I used a stitched rectangle die and the same small snowflake die at the same time to create my sentiment mat.  I added another colored gumdrop to the snowflake.  

Center Panel - Decadent Snowflakes Create a Card Die - Crafters Companion
I created the silver foil frame in Cricut Design Space
Sides - Ornament Panel Die - Impression Obsession - I cut the bottom portion of panel off to fit
Fancy Embossed Ornament cut from glitter and then I backed with silver foil
Creative Expressions - Mini Expressions-Stacked Merry Christmas
Smaller Snowflake layered on top - Set from Amazon
Stitched Rectangle die set stack - Amazon  I used the largest in set
Inside sentiment - Holiday Sentiments Stamp - Your Next Stamp

Thanks so much for stopping by.  I hope you enjoyed my project today because I sure enjoyed making it.

I am entering into these fun Challenges:  

Simon Says Stamp Monday - Sparkle Mode

Simon Says Stamp Wednesday -  Happy Holidays/Christmas 

Cardz TV Anything Goes Challenge #155

Die Cut Divas Challenge - Winter/Christmas with optional twist Shaped Card Holiday

Your Next Stamp Challenge -  #173 Sparkle & Shine

Cut It Up Challenge - #240 Holiday Cards

Hello Kitty Elf Shaped Card

I adore this fun Shaped Card.  I went with the traditional Christmas colors today.

Card cut and Kitty - Cricut Hello Kitty Greetings Cartridge
w/ Matching Tag everything the same minus the banner lol
Stars Hearts Banner -  cut from white glitter paper and trimmed down to only the 2 stars
Inside Sentiment - written with Cricut Pen 0.4  Font - Annie BTN
Spectrum Noir Clear Sparkle pen - I went over the white bottom of hat and 
the white pom poms for both hat and shoes on card and tag as well.


For the Tag I cut the back white layer as an afterthought so I just snipped off top of hat where I had already punched a hole and added the silver twine.  
To: & From: stamps - Noel Christmas Ornaments Stamp Set - Just Rite Stamps


As always thanks for stopping by, hope to see you back soon.


I am entering into these Fun Challenges:

Thursday, December 2, 2021

Snowflake Blizzard Card

Hello Crafty Peeps.  I am working on more Christmas Cards, another Snowflake for today but with much more whimsy this time.  This card makes me smile and I'm pretty sure the recipient will too.  

Bundle of Stitched Shapes - Large Stitched Rectangle - Simon Says Stamp dies
Snowflake Swirl Embossing Folder - Darice
Snowflake Die Cut and Center - Cricut Winter Woodland Cartridge - Snowflake #4
Sentiment written with Cricut Pen 0.4 Tip - Font Aundee Btn
Die-namics Fishtail Flag Frames - My Favorite Things - MFT
Happy Lashes 1 1/8″ Face Stamps - PK-0461 - Peachy Keen
Face - Stamped & heat embossed with Memento Black Tuxedo Ink 
   - Cheeks Pink Glitter Chalk & Mouth Spectrum Noir Colorista Lipstick Red
White Glitter Paper for Snowflake & Banner - Face shape - Spectrum Noir  Clear Sparkle Pen
Inside Sentiment Panel - Cross stitched Banner Stack
Inside Sentiment written with Cricut Pen 0.4 Tip - Font Aundee Btn
Silver Twine for the Bow

Wednesday, December 1, 2021

Glitter Snowflake Merry Christmas Card

 I love this beautiful snowflake card front die.  This was a fun easy card to make… I spent more time weeding out the tiny pieces from the snowflake die cut then anything else I think lol.  So I got this pretty glitter sticker paper from the dollar tree… the trick to die cutting this stuff is to peel off the backing and place it on cardstock FIRST and then die cut…. Perfect cut every time, even on an intricate die like this.

Ok so I cut the card front die out of the blue glitter sticker paper that I had adhered to cardstock.  I then cut a smaller square of purple glitter paper using the same process but I just cut it big enough to fit around the large snowflake that I wanted to layer and ran through big shot again.  I then took my scissors and cut away everything around that snowflake.  Then I attached it in its place on top of the blue.  I adhered it flat over the original snowflake, it really pops that particular snowflake out from all of the rest.  I then cut another smaller die snowflake from the blue glitter paper to layer on top, this time only gluing in the center so it can be lifted and more 3-D.   I cut a frame to fit around the pretty snowflake card front from white cardstock…. It seemed a little to plain so I ran it though an embossing folder to give it some texture.  I backed the card front onto this pretty lavender designer paper. And then mounted to a white card base.  I cut the Merry Christmas word Die from the same purple glitter paper and for one last touch I added a white glitter gem to the center of the layered snowflake that I had colored with a purple spectrum noir alcohol marker - LV3.

For the inside I kept it simple and used the same designer paper that I backed the front with, this time using a stitched die to cut it out and stamped my sentiments inside.   And for a final touch I took one of the extra pieces from the extra purple snowflake cutaway and attached it at the top inside above sentiment.  Oh yeah and I took another small snowflake die from my stash that cuts a cute shape out of the center and cut from blue glitter paper and only used that center to top off the inside purple snowflake.

Decadent Snowflakes Create a Card Die - Crafters Companion
Creative Expressions - Mini Expressions-Stacked Merry Christmas
Snowflake on top and inner center inside - Set from Amazon
Bundle of Stitched Shapes- large Rectangle - Simon Says Stamp dies (inside)
Darice Basket weave Embossing Folder
Holly Berries Christmas Stamp for both inside sentiments

Thanks so much for stopping by, I hope you enjoyed my project today.


I am entering into these fun Challenges:  

Simon Says Stamp Monday - Sparkle Mode

Simon Says Stamp Wednesday -  Happy Holidays/Christmas 

Modsquad Challenge - Just Snowflakes

Cardz TV Anything Goes Challenge #154

Die Cut Divas Challenge - Winter/Christmas

Your Next Stamp Challenge -  #173 Sparkle & Shine

Dies R Us Challenge - Anything Goes using die brand they sell -  #182

DL.ART Monthly Linky Challenge - December Anything Goes

Tuesday, November 23, 2021

Count your Blessings Sunflower card

I got this cute corner flip card and the sunflower from Cheryl over at CreativeKuts.com

I used my Cricut to cut both the card base and sunflower.  I added some wink of Stella to the center of sunflower to add some shine.  I used a stitched square die to cut the mat for the sunflower.  The sentiment I had in my stash, the word blessings is soft and flocked.  I cut a shadow layer for that sentiment oval with my SNC.  


On the inside I used Bundle of Stitched Shapes- large Rectangle - Simon Says Stamp dies for the background layer.  Then I used a stitched rectangle Die to cut an Orange mat and another to cut the white mat for sentiment stamping.  Thankful for you! - Thankful for you Stamp Set - Cardz TV.  Happy Thanksgiving - Happy Celebrations Stamp Set - Craftin' Desert Divas

 Thanks for stopping by, Hope to have you here again soon.  Have an awesome Day!

I am entering into these Fun Challenges:

DL.ART Thankful Thursday Challenge (3 entries) - #289 Thanksgiving


Diamond Plate Happy Birthday Card

 Hello Crafters, today I made a masculine Birthday card.  I have so many birthdays coming up in December, I knew I better take a pause on Christmas cards and get some of them done and ready for the mail as 3 of them are the first week of December.... EEK! lol

I based this card on a SKETCH challenge over at Your Next Stamp Blog
Ok, so I tried to keep it simple and masculine.  I used the Cuttlebug Diamond Plate embossing folder to create my background,  I chose to Deboss  for this card.  I used foil paper from the dollar store that I adhered to black card stock.... this gives it more stability and the embossing/Debossing comes out real clean and bold.  I used Bundle of Stitched Shapes- large Rectangle - Simon Says Stamp dies for my debossed background layer.  I used my SNC for the shadow layer behind my debossed background layer and also for the shadow layer behind  the 2 Banners.  those are - Stitched Fishtail Flag Stax Banners - MFT.  I used a pretty shiny grey paper that almost looks like a galvanized bucket color for all of those shadow layers.
For the Happy Birthday Thinlits Die - Stampin' Up, I first attached foil Paper to black cardstock once again to get the foiled shiny layer.  Then I cut it again from just black card stock which I trimmed away the bottom word and adhered it to the top of the entire cut.  I then used a die cut from my stash (Nina Die - Creative Expressions) that I knew had these perfect sized circles to simulate the silver brads.


For the inside I cut another stitched background layer using Bundle of Stitched Shapes- large Rectangle - Simon Says Stamp dies form white cardstock.  I stamped and heat embossed the sentiment stamp from Birthday Cheer Stamp Set - Hot Off The Press

***UPDATE I decided to make a matching gift tag to go with it.....

I cut the black Tag from Mama Elephant, Framed Tags - Union Square. Then I attached the silver foil to black cardstock again and ran it through with a stitched square die and then ran that through with the Diamond Plate Cuttlebug embossing folder, but debossed.  I attached it to the tag with foam squares and then cut and attached his name using the Cricut.

Thanks so much for stopping by to see my project, I hope you will leave a comment.  Have a wonderful day.

I am entering into these Fun Challenges:

Monday, November 22, 2021

Dashing By Reindeer Cards

 Hello Again, today I have 3 cards to share that I made based on one layout but used different colors and styles on each.  My wrist/hand is getting a little better each day.  I am so thankful to be crafting again so I don't want to be back to that again so I am trying to take things slow and easy but push myself a little further as time goes by.  The Sticker cards were fun but I thought I would test to see how I could do coloring stamped images.  Well it proved to be a little more difficult than I thought it would be but I love the way all 3 cards turned out.  I think I may have to go back to easier for a bit longer, but hey at least I am crafting again so I will take it!  The Stamp set I got the cute little Reindeer from is Reindeer Wishes I got from Amazon.

I CASED this card from https://www.dkirbystamps.com/2018/10/dani-deer.html?spref=pi

This one Is larger deer stamp, Stamped on white cardstock colored with CC alcohol markers, Nose is paper pieced on top.  Nose and white chest & tail have clear wink of Stella brushed over.  Background Postage layer is cut from White Polka dot tissue paper.

This one is the smaller deer stamp, Stamped on white cardstock colored with CC alcohol markers, Nose is paper pieced on top.  Nose and white chest & tail have clear wink of Stella brushed over.  Background Postage layer is cut from Plain Vellum that I ran through big shot with my Snow falling stencil to give the snow dots effect.
Another small deer stamp, this time stamped onto Kraft cardstock.  The white chest, white tail tip and inside of ears along with Nose are all paper pieced on top.  Nose and white chest and tail tip have clear wink of Stella brushed over.  Background Postage layer is cut from white card stock that I also ran through with the Pinpoint Snowflake Plate Craft Die - Memory Box

Pinpoint Snowflake Plate Craft Die - Memory Box
Diagonal Stitches Cover Panel Die - Reverse Confetti
Bundle of Stitched Shapes - Simon Says Stamp
Postage Stamp Dies - La-la Land Crafts
Stitched Fishtail Flag Stax Banner - MFT (I cut off ends, used for Sentiment Block)
Snowglobe Cutting Dies - Hot Off The Press (Snowflakes)
Whimsical - Christmas Small Stamp Set (inside Sentiment & Reindeer)
Front of Card Sentiment - written with Cricut pen

Thanks so much for stopping by, I hope to have more Christmas cards to Share with you soon.

I will be entering into these fun challenges:


Saturday, November 20, 2021

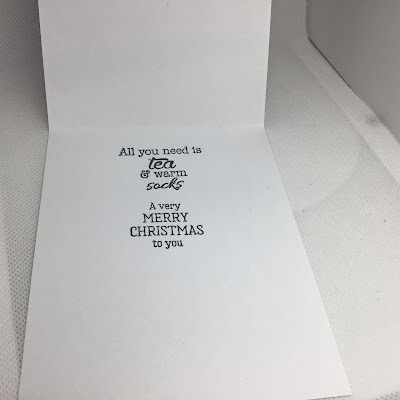
Tea And Warm Socks

 Here is the very last card for my fun cards that I created from that one sticker sheet.  This makes Card number 11 woo-hoo I really got a jump on my Christmas Card list.


For this card I used just a few Dies:

Bundle of Stitched Shapes - Simon Says Stamp dies  ... That I also ran thru with the

Diagonal Stitches Cover Panel Die - Reverse Confetti

Stitched Wavy Square Stack I cut two sizes to make the frame

Special Merry Christmas Word Die - Memory Box


 And the inside sentiment stamps came from two different sets:

"All You need is Tea & Warm Socks" came from - Christmas Winter Sentiments Stamp

"A very Merry Christmas to You" came from - Holly Berries Christmas Stamp

Thanks so much for stopping by, I hope to be back soon with more cards


I am entering into these fun challenges:

Cardz Tv Anything Goes Challenge #154

DL.ART November 2021  Linky Challenge

DRU Challenge #181


Wednesday, November 17, 2021

Christmas Cards From a foam backed sticker Sheet 2

 More fun cards I made with that one sticker sheet... this is card #6 thru #10

On all 5 of them I used these Dies:

Bundle of Stitched Shapes - Simon Says Stamp dies

Diagonal Stitches Cover Panel Die - Reverse Confetti

Nested Stitched Scallop Rectangle Set - Cottage Cutz 

Pierced  Memory box Frame 

On three of them I used the Special Merry Christmas Word Die - Memory Box
For the Christmas Tree Card I used the For You Frame Stamp which I heat embossed in Green and cut out, that one is from Reindeer Wishes stamp set.  Finally from The Santa card I used a stamp from Santa Suit Stamp Set - Stampin Up and I cut that out with a pretty die from 
Spellbinders - Opulent Ovals


For the Inside of the mittens card I used Chilly Cheer - Christmas Small Stamp Set


And for the other 4 cards I stamped the inside the same using my stamping tool
Stamps are from Holly Berries Christmas Stamp set


As always thanks for stopping by.  I hope you enjoyed these fun cards and I will be back soon with more fun.


I am entering into these fun challenges:


Christmas Cards From a foam backed sticker Sheet 1

 So I have been super busy getting my craft room cleaned organized and a little rearranging so I can get back to what I love.... Making Stuff and especially cards.

So during my Craft room overhaul I have found so much stuff for Christmas cards that I have hoarded away.  You know what else I found?  Loads and loads of saved Christmas paper scraps, card layers I used dies to pre cut with other scraps, card bases.... just lots and lots of stuff crammed away just taking up space.  Well I have decided to get busy using some of it and getting my Christmas cards going in full force.

Today I have the first half of Eleven cards I made from one sheet of foam backed Stickers.  I don't usually create with stickers but sometimes I see really cute ones and think that would make a cute card.  So I end up buying them and never use them, so this is the year that changes!!!  I hope you enjoy them because I sure had fun making them.

Cards 1 and 2 I used  card Sketch #2 From Mary's Card Sketches at Cardztv.blogspot.com

For both of these first two cards I used up scraps for the background design, which were placed on a solid Stitched rectangle mat that I cut with Bundle of Stitched Shapes - Simon Says Stamp dies and for the smaller mat I used a Scallop Stitched Oval die and used my scan n cut to make a shadow layer in the purple card stock to back it.  The stamps are from Tiny Tags Christmas Stamp Set - My Craft Spot which I heat embossed in purple. 

For the inside on both, I stamped a sweet sentiment in Memento Tuxedo black from Inkadinkado Cool Christmas Stamp Set and the cute little presents I stamped in purple are from Elegant - Christmas Small Stamp Set.

Card 3 and 4 are based on the same sketch layout and all stamps are from the same sets...


and finally card number five is just a little bit different.  For this card I used Mary's Sketch #10.  and I changed up one of the inside card stamps in the bottom corner and that one is from Be Merry - Christmas Small Stamp Set


Thanks so much for stopping by I hope you enjoyed the first set of cards, I will be back soon with more.


I will be entering into these fun challenges:

Cardz Tv Anything goes Challenge

Modsquad Challenge - Animal Themed

Simon Says Stamp Monday - Trees