Tuesday, July 28, 2015

Ride the Wind Owl

Hello Crafty Friends, today I had some fun playing with my newest stamps & Sequins.

I started out by cutting the corner of a 12x12 Momenta scrapbook paper so I could use it for my background.  Just a fun mostly sky scene with clouds and a bit of grass at the bottom and then a fun scallop and lines across.  I thought it would be the perfect base for this creation.  So over in our Group on FB today begins the new challenge which is Ride the Wind.  This is what I came up with to help[ promote our fun challenge.

The Owl and "Sending OWL my Love" sentiment are both from Craftin Desert Diva's Owl-idays stamp set and you can find them here.  The Owl is stamped in Memento Black tuxedo ink onto white cardstock, I then used my scan n cut to cut him out.  I colored him in with Crayola SuperTips markers.  The Balloon stamp is from Echo Park, I used my American Crafts Stamp markers to color in balloons and using my new stamp positioner I stamped just the balloons first.  I then wiped the stamp clean, inked just the strings in black tuxedo and stamped again.  I am in love with this new stamp positioning tool I made with inexpensive products... video that I followed can be found here

This is the stamp positioner I made from watching video above

2 of the 4 stamp sets I used for this one :)
After stamping the balloons I cut them out on my scan n cut and then I took some blue chalk and rubbed the area of the balloon strings so it would blend with the blue background.  I adhered the tip of the balloon strings to the candy stick the owl was holding and tried to make it look as though he is holding the balloons.  I colored in just to the edge of the owls head on the strings to make it blend well.  The sentiment I stamped right directly onto the fun striped cloud.  for the cloud face I used a Peachy Keen - Basic Paper Dolls face.  I didn't have a blowing face so I thought this one would work... it kind of looks like he is taking a big breath in to blow.  the wind swirl was from another stamp set in my stash that I had to mask off because it is actually snow flakes blowing... but I just wanted the wind.  I added blue shimmer chalk to the cloud cheeks and to the windy swirl.

Some of my new sequins... I used some from all 3 of these sets

At the bottom where the scallops are I decided to dig in to my new fun sequins and add all of the balloon colors for the sequins, I really like the touch this added.

I am entering this card into these fun challenges:
Simon Says Stamp - Sparkle & Shine
DL.ART - Thankful Thursday Challenge #161 Summertime

As always, Thanks for stopping by to see my creativity at work.  Have a happy and crafty day.  ~ Eva Scraps

Monday, July 27, 2015

Joy Ornament Card

Hello crafty friends, I am back with another Christmas in July Card today.

I cut an ornament tag from red glitter foam from a Spellbinders die.  Both of the silver pieces are cut from Activia yogurt container lids, washed of course and the shiny underside used.  The die cut shape is from Spellbinders Moroccan Motifs and the J & Y are also cut from red glitter foam cut with Sizzix bubble font.  The large white snowflake is a large sequin and I added a shiny red sequin in the center of it.  I also added a string of red and white Bakers twin to hang the ornament from.

The background is black corrugated board and white felt both cut with Craftin Desert Diva's - Outdoor Landscape Die.  The sentiment stamp is from my stash... Unfortunately not sure of maker.  I also scattered white iridescent sequins about the snow (White Felt) layer.

I am entering into these fun Challenges:
 

Thanks as always for stopping by, I would love to read your comments so please leave one. Have a happy and crafty day my friends.
- Eva Scraps

fun sketch card

Hello crafty friends.  I created this card for a sketch challenge over at Jo's Scrap Shack and got to use some of my newly purchased items.

The stripes down the diagonal of the card are some fun tapes I found at Dollar Tree and so is the Butterfly sticker.  I changed the original ivory color of the butterfly sticker by coloring it with my pink and purple stamp markers and then brushing it out with my water brush to soften the color.  I then drew around the sticker on white card stock... ran it thru my Scan n cut... then cut 3 different colors to mat the butterfly each a little larger than the next.  Under that is a die cut from Spellbinders "Moroccan motifs". 

The stamped Butterfly Scroll is from hot off the press, colored in with markers and lots of bling added. I ran out of orange rhinestones so I colored them in with an Orange sharpie pen from my new 20 pack of Sharpie markers.  The Sentiment stamp is also from HOTP but a dragonfly stamp set ... I thought the saying was perfect for this card.

I am entering into these fun challenge:
Jo's Scrap Shack - Fun Day Friday -  #98 Sketch Challenge
Lil Red Wagon - #299 Thickers & Stickers

Thanks for stopping by.... have a wonderful and crafty Day
Eva Scraps :)

Thursday, July 23, 2015

A flip fold Christmas in July Card

This was a fun and easy card done up in my fav colors of course lol.  I used some Cricut Pattern Paper for the snowflake liners.
Card Open
The card Base is from Cricut Artiste
The label Shapes are from Cricut Art Philosophy
The Snowflake & Christmas Light bulb are from Cricut Very Merry Tags
The corner scrolls are from Spellbinder's Frosty Forms
The Beautiful Dew Drops are from The Robins Nest - "Mardi Gras"
The Stamp is from my stash (Sorry unsure of Maker)
Front of Card

This is a fun easy card to put together... the next time I make these it will be with double sided card stock  so no need to fiddle with making the liner papers and will be easy to mass produce several cards for your card list with ease.

I am entering into these fun challenges:
Craftin Desert Diva's - Christmas in July
Dies R Us - Christmas in July

Thank for stopping by and I hope you have a super awesome and crafty day :)

My Big Happy News... I WON!!!

So I am sooooo gosh darn happy and on cloud 9 right now I had to drop in and share my big Happy news with you all.  Last night on Facebook I won the new Cricut Explore Air over in the fabulous Group Cricut Lovers Guide to Design Space for their fabulous 15,000 member Giveaway celebration. 

So Funny story I have to share >>> when I saw my name as the winner my heart leaped a little but then I noticed it just said Cricut Air... so I thought hmmmm... Don't get too excited Eva... thinking it may just be the air adapter for the Explore.  So when I messaged Paulette Trent I asked if it was for the air adapter.... she replied "It's the Cricut Explore Air!!! The one with the built in bluetooth! Congrats!!!!"  OH MY GOSH!!!  Then the celebration began... lol   I am so excited and cannot even believe it!!! Yay Happy Dance - Happy Dance - HAPPPPY Dance!!! WOOOT WOOOT   I feel so lucky and blessed and very very HAPPPPPY!!! 
Paulette said "Sorry I left that one itty bitty word out of your prize when I posted it! :) "  that's okay Delayed celebration by a few seconds  hahahaha  To think out of all those entries I got picked at random for the fabulous Grand Prize.... I am still in shock I tell you!!!  Not sure what color mine will be but this is the one for sale over at Cricut.com right now:


If you are a Cricut lover and own an explore or even plan to get one.... this group is for you!!!  It is all about crafters helping crafters and sharing their awesome work.  I know during this learning curve with my new win.... I will be soaking up all the knowledge I can from the wonderful crafters there.  They have fabulous giveaways, obviously lol ...and even share design space files of projects they have created.  It is a great place!!!  So what are you waiting for?  Go check them out and tell them Eva Scraps sent you :) here is the link to their FB group Cricut Lovers Guide to Design Space 

I also admin a fun group on FB along with my crafty friends Sarah Burton and LeeAnn McKinney ... where we just share our love of paper crafts using Cricuts or any cutting machines and we have regular fun challenges with die-cuts for prizes to our US entry winners drawn at random, please feel free to come join us as well on FB at Cricut Creative Corner & other Cutters Welcome

A big shout out to all of the wonderful crafty well wishers that shared in my celebration last night and this morning on FB... I am so lucky and fortunate to have such a huge crafty friend base online and I honestly appreciate each and every one of you.... Thank you!

Crafty Hugs, Eva Scraps :)

Wednesday, July 22, 2015

Dazzling Star Christmas Card in July


Hello my crafty friends, I have another fun Christmas in July card to share with you today.

I used a Kraft card stock for the card Base and distressed the edges with walnut stain distress ink.  I Layered a red piece of card stock and a soft tones sheet music pattern paper together, distressing edges with walnut stain ink again.  I cut a ornament tag from red glitter foam from a Spellbinders Holiday Tags die, then cut the same one from the Kraft card stock.  I then embossed the Kraft one, distress inked it and stamped "For You" (Craftin Desert Diva's - Short & Sweet Tags) in black memento ink.  I took some brown ribbon from my stash... actually winnings from my crafty Friend Karen over at Little Scrap Pieces.  I have hoarded this since last year but just recently won again so now that more is on its way I guess I decided to break into it lol.  I hoard some things thinking it has to be the right project or the right time to finally break into it lol.  Anyhow I tied it around the red and music sheet layers and added the tags with red and white twine then tied a bow in the brown over top of the tags.

I cut the Banner from spellbinders Ribbons & Banners die set from red glitter foam.  I then took that same Banner die, I placed it on a piece of white card stock scrap and used a pencil to draw the inner section onto the white scrap... I took that and scanned it in on my scan n cut as a direct cut.... After I had the image scanned I took out the white drawn scrap, and replaced with the Kraft card stock..... On my scan n cut I told it to increase outline to plus .04 and oh I was so happy how well that worked out to layer onto my banner cut!!!  First I stamped "Merry Christmas" (Craftin Desert Diva's - Happy Celebrations) with Black tuxedo ink, then I glued it onto the banner.
Dazzles before I added the red star backgrounds :)
Now to the Stars, which I got so excited about this because they are actually HOTP Dazzles.... I love love dazzles but I hate to hand cut anything so these lovely's have been in my stash for quite some time.... Today I thought I would try cutting backgrounds for them with my Scan n cut... Problem was that the shiny on the dazzles wouldn't let the scan n cut get a good scan.... I thought if I take a star dadazzel and trace around it in pencil then remove dazzle to run just the pencil outline thru...YEAH!!!  And that of course would work but another thought crossed thru my mind.... I checked the preloaded shapes in the machine and the star looked very similar so I measured the dazzles and tried a test cut in white... Woo hooo I was so happy and excited because it was almost perfect fit...Yay!  So I cut both sizes to fit the two stars in red and adhered them both together.  I then cut a star 1/4" bigger than the small one in Kraft card stock.  I glued the big star directly onto the music notes paper, then I added a foam dot then the Kraft star another foam dot and the the small red dazzle star on top.  Then I added some pretty shiny red sequins sporadically around the front of the card.


On the inside.....I will add this later my camera is messing up and I am tired of dealing with it at the moment lol

Friday, July 17, 2015

Purple Flowers Swing Card


Hello Crafty Friend's, I have been on a roll posting a new project everyday over the last week... sometimes even 2 in one day lol.  No post yesterday but I am back on track today with a fun new swing card. 
Front of card Closed
I created the base myself in SCAL... that was a bit of a battle but I finally got it.  The papers are from Recollections  "Habitat".  The flowers I airbrushed the color in and then cut them out on my Scan N Cut.  For the Big Center flowers I made two and then cut just the big center flower out and then layered it up with foam tape. 
Inside Fully Open
On each of the smaller flowers I added some purple puffy paint to the centers and then went over that with a dab of glossy accents.  The big flower center is airbrushed yellow and then Glossy accents over that.  the added die-cut Dragonflies are from Cheery Lynn - "Tiny Things with Wings" which I also went over with glossy accents to make them shiny.  The Sentiment was created on my computer.


Front Spinning
Inside Spinning
 

I am entering into these fun Challenges:

Die cut Diva's - Summer / Patriotism

Thanks a bunch for stopping by, I would love to read your comments so please leave one.  Have a happy and crafty day my friends.
- Eva Scraps


Wednesday, July 15, 2015

Ice cream shaped edge Birthday Card

Hello my crafty Friends,
Oh my goodness where to start with this card.  Well first of all I loved these papers so much from last weeks card I had to use up some more of the scraps from it.  The Paper Studio Uptown Flair Stack.
Card standing up showing the awesome shaped front
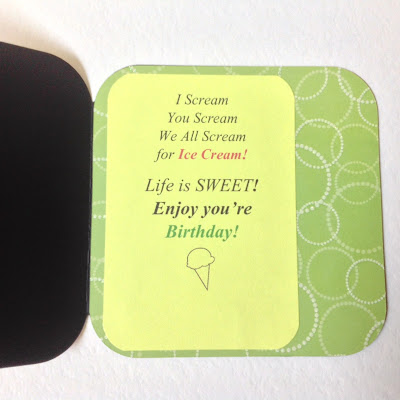
The card base itself I created in CCR with the adorable ice cream cone from Indie Art cartridge, love this super cute ice cream cone!  I embossed the cone part with Sizzix Diamonds folder to give it some more definition.  The face stamp is Peachy Keen and is from a cute large Gingerbread dolls set and I thought her face would be perfect for this ice cream cone.  I used white gel pen to enhance her eyes, pink gel pen for her nose, pink chalk for her cheeks. I added glossy accents in the white parts of the ice cream scoop and sprinkled some green and pink and white sequins on her head to represent ice cream sprinkles.  
The Card laying flat with the green part inside showing
The flower is from spellbinders "Jewel flower and flourishes"  I cut once in black and then once in pink.  I stamped a cute little "For You" stamp in the middle of the flower which is from Craftin Desert Diva's "Short & Sweet Tags" ah, Perfect fit!  Then I edged around that with glossy accents and added neon green fine glitter over the top.  
 
The "Sweet" stamp is from some scrapbooking sets I bought at oriental trading co when I first started out years ago so I don't remember the maker.  Anyway for the background layers for the stamp I took my pencil and drew around my entire stamp on white cardstock. Then I took that to my scan and cut and had it cut out the penciled outline. Yay, worked perfect...Awesomeness!  Then I added an outline for the next cut in Pink and a little bit bigger outline cut from the green.  Perfect layers... so happy!!!  Then I stamped the sweet stamp onto the white layer in versaMark ink and embossed with black Zing embossing powder.  I layered all of the pieces together and adhered to my card and sprinkled on some more sequins to enhance, in pink and green this time.  
Card Inside
On the inside I used a fun greeting I created on my computer and cut to fit behind the front panel.  I really love how this card came out and I will find it hard to give away lol. But I think this one will end up being for my grand daughter who is turning 9 and I know she will love it.  Hmmmm or maybe it is a little too young for her.... I don't know we will see hahahaha.

Tuesday, July 14, 2015

Hey Monkey Beach Card


Cricut create a critter is such an awesome cartridge.  The monkey, Palm trees, vine and sun are all from that cartridge.  The cute lil peachy keen "Oh baby" face stamp worked perfect on the monkey and PK "Boy Mates" face stamp for the sun.  I used Sizzix diamonds embossing folder on the tree trunks.  I used 2 of the 3 dies that come in the set of  Craftin Desert Diva's "Outdoor Landscapes" for the awesome stitched waves and sandy beach.  The Hey Monkey stamp is from a set I picked up at the dollar store a while back and I thought it would fit perfect for this card.  I inked edges of pieces with walnut stain distress ink.


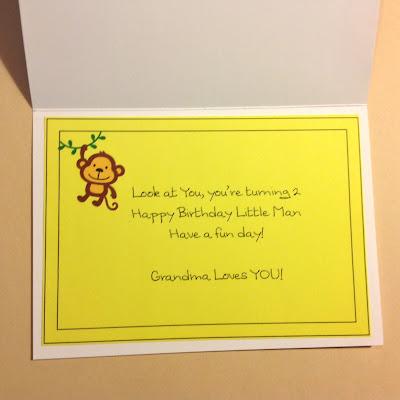
For the inside, I used a printable version I made of the same monkey.... And of course a birthday greeting for the little man to say Happy Birthday.


I am entering into these fun Challenges:
Bitten by the Bug 2 - Swimming / Water. (Cricut Create A Critter)

Thanks as always for stopping by, I would love to read your comments so please leave one.  Have a happy and crafty day my friends.
- Eva Scraps

Porthole center step card


This card was made with 3 files from Pretty Paper Pretty Ribbons.  I love this PortHole, the file is for a full card but I chose just to use the top layers so I could put it on the center step card base (SVG Attic).  This  porthole card file was only 99 cents!  What a deal and I will be using it a lot I am guessing.  You can find all three PPPR files that I used here. I chose to use my brand new waves die (CDD) for the water inside the Porthole but the file has its own very cool cuts for the water that I did not use this time around.  
 

The title at the bottom is a freebie file I just received for the recent blog hop I got to hop thru.  How fun and so many fabulous projects on the hop.  The Sea Horse is the Friday freebie right now and I decided to do those as a print and cut.  The sea grass and coral along the edges of the card are just bigger versions from the ones on the under the sea title.  I added blue bling rhinestones around the title for bubbles and some assorted sized sequins scattered in the water and a die cut from spellbinders twisted metal I added to look like a pole on a buoy holding a flag to say Happy Birthday 2 U (stamp & Flag from CDD).  Oh and I almost forgot, I placed blue brads in each bolt hole... I love the look it created for the Port Hole.
Here is a side view so you can see some of the fun layering


For the inside, errrr... well back of card in this case.... I used a computer generated sentiment square, which I made up myself and added the super cute Sea Horse in printable form and added some light blue bubbles around.

Monday, July 13, 2015

Happy birthday cake card

A quick fun Birthday card I created from Scraps to add to my stash for a little girl.  
Papers - recollections garden florals stack & ivory card stock
Embossing - Happy Birthday small Sizzix folder
Die cut circle - Hot off the press circles and scallops set
Die cut birthday cake - Cuttlebug Party set
Stickles - green
Candles flames - glossy accents with yellow recollections glitter

I am entering into these fun challenges:
Fab n funky - #267 inspired by a song (Song - Happy Birthday to You)

Thanks so much for stopping by :)
-Eva Scraps

Sunday, July 12, 2015

Stars & Stripes birthday card

I made this fun birthday card this morning following an awesome sketch challenge over at Die Cuttin' Diva's.  I think the hardest part for me in all of this was to pick the papers but I finally settled on this bright and sparkly stack from The Paper Studio called "Uptown Flair"   The pink layer is embossed with Cuttlebug Stars embossing folder.  The"Happy Birthday" stamp is from Craftin Desert Diva's "Happy Celebrations" stamp set.  The die cuts are from Spellbinders ... the small stars are from Moroccan accents and the large star is from Moroccan Motifs.  The face stamp on the large star is from peachy Keen "princess" face stamp set.  I chalked the cheeks with pink chalk and dotted the cheeks and eyes with a white gel pen.  I added some green gems to the center of each small star.


I am entering into these fun Challenges:
Cuttlebug Mania - Tic-Tac-Toe  (Pink-Birthday-Emboss)

Thanks as always for stopping by, I would love to read your comments so please leave one.  Have a happy crafty day.
- Eva Scraps

Saturday, July 11, 2015

Butterfly Fuse Shaker Card

I am on a roll this week.  I can't get enough of this new awesome fuse tool, I can see lots of shaker cards and pocket pages in my future :)


Butterfly - SVG Cuts ( Changed to a cutout for the shaker)
WRMK Fuse Tool and Page protector material for shaker
Sequins & Glitter to fill shaker from Stash
Face Stamp - Peach Keen "Everyday Paper Dolls"
Edge Punch for Green - Martha Stewart (Punch Around Page) "Loops"
Embossing - Darice "Floral Vines"
Tag - Spellbinder's Twisted Metal
Sentiment - Craftin Desert Diva's "Lil Bit Buggie" Stamp set
WRMK Corner chomper to round all four corners of card


For the inside I used some of the same materials.
"Butterfly Kisses" & Butterfly Stamp- Craftin Desert Diva's "Lil Bit Buggie" Stamp set
"&" stamp "Birthday Wishes" stamp set - each from CardMaker Kits

I am entering into these fun challenges:
Craftin Desert Diva's Linky Party - Birthday
Die-Cut Diva's - July Challenge - Summer or Patriotism
Lil Red Wagon - Challenge #297 Birthday theme
DL.ART July Linky Challenge - Anything Goes


Thanks for stopping in to see my latest project, have a crafty week :)
~ Eva Scraps~

Friday, July 10, 2015

Elegant Snow Globe Card

Hello crafty Friends, after yesterday's shaker card which needed a bigger globe than I originally thought so today I wanted to use the other globe I cut out to begin with. 
I decided to make this one a bit more elegant, but not a shaker this time.  Using my Frosty Forms for the die cuts and of course had to use the awesome "Outdoor Landscape" die from Craftin Desert Diva's again for the snow layer... ooh I love that stitched look.  The sentiment stamp is from My Craft Spot "Tiny Tags Christmas"  worked perfect for the half tag I added.

On the inside I used a snowflake & sentiment stamp from a CardMaker kit.  What a beautiful message :)  The Snowman at the bottom is also from Frosty Forms.

Items I used:
Snow Globe - Cricut DoodleCharms
Embossing - Sizzix "Snow Caps" folder
Deer, Bow, Swirly Border & Snowman - Spellbinder's Frosty Forms
Half tag at bottom - Spellbinder's Twisted Metal
Stitched Snow Layer - Craftin Desert Diva's "Outdoor Landscape" die
Front Sentiment Stamp "Christmas Cheer" My Craft Spot "Tiny Tags Christmas" Set
Large Sparkly Snowflakes - Martha Stewart double sided stickers w/ glitter sprinkled over
Blue Inks - Martha Stewart Cats eye stack
Stamped Snowflakes & Inside Sentiment Quote - CardMaker kit stamp sets

I am entering into these fun Challenges:
HIMCR - #206 Red, White, & Blue w/ twist "Christmas"
DL.ART Thankful Thursday Challenge - #160 Christmas in July

Thanks for stopping by :)
~ Eva Scraps ~

Thursday, July 9, 2015

Snow Globe Fuse Shaker shaped card

I had so much fun making this card for a Christmas in July Project.  I wanted to try out my new Fuse tool by We Are Memory Keepers... Wow... I LOVE it!!!  It is so easy to use and fun... I want to fuse everything now lol. 

Okay on to my card, I made the shaped base, frame and layers for the snowglobe from Cricut DoodleCharms.  The shaker part is attached to the frame and then on top of other layers... the only thing inside the pocket is the glitter powder and chunky glitter.  I must give a shout out to Tara from CDD for the fantastic new landscape dies.  It really complimented this piece well and added the perfect layering dimension :)

Supplies I used:
Snow Globe - Cricut DoodleCharms
(I created the front frame & Shaped Card Base in CCR)
Inside stitched snow layer - Craftin Desert Diva's - "Outdoor Landscape Dies"
Snowman & Mittens - Peachy Keen "Snow Me A Man" stamp set
(both Snowman & Mittens cut with Scan N Cut... oh my gosh look at the fine cut detail in his arms... I love that machine!)
Coloring - Crayola Markers
Embossing - Sizzix Snowcaps
Red and white Bakers twine for mittens
stamped versamark snowflakes inside with blue glitter on the blue background layer
white fine glitter on snowman body
Snowflake thru xyron and blue glitter added - My Craft Spot
Blue bling from stash
Banner - Spellbinder's Ribbon Banners
Merry Christmas Stamp - Craftin Desert Diva's "Happy Celebrations" 
Shaker pocket created with my new Fuse tool
Shaker filled with Michael's Glitter Powder & a little Creatology Chunky Glitter


for the inside I cut a smaller layer to stamp greeting on (Card Maker Stamp) , inked edges in blue ink and stamped same small snowflakes as the front only this time with blue inks

I am entering in these fun challenges:
HIMCR #206 - Red White & Blue w/twist "Christmas"
PDE Linky Party - Anything Goes
DL.ART - July Linky Party - Anything goes
Outlawz July Challenge - Anything Goes


Thanks for stopping by to see what I have been working on.  Hope to see you again very soon :)


Wednesday, July 8, 2015

HB2U Butterfly watercolor

one more fun water color card I had to make and share.  This time I used regular white card stock and my stamping markers colored onto my acrylic block, spritz with water and then saturated the color up on my paper.  after it dried I ran through cuttlebug with Argyle embossing folder made by Sizzix.  I added several recollections foil butterflies and flowers.
the "HB2U" sentiment and the cute tag (Short & Sweet Tags) are from Craftin Desert Diva's.  Easy Cheesy :)

 
I am Entering into these fun Challenges:
 
Thanks for stopping by, Have a wonderful day :)

Caught a Bug? water color Card

Hi Crafty Friends,  More water coloring for today's Project.  This one is with water color Paper and real water colors.  This was so much fun!  The cute Recollections sticker bugs were perfect for this with their adorable googly eyes. I used a white die-cut behind each bug from Spellbinder's Moroccan Motifs.

The tag is from Cuttlebug Emboss Plus folder - Embossed Tags... I just bought this on clearance and really like it... they cut and emboss at the same time and there is a window you can open to chalk or ink raised embossed part... Love this set!  So I used the same watercolors to color the embossed part and decided on the purple... of course because Purple is my favorite color :)

The Caught a bug? sentiment I used is from Craftin Desert Diva's "Lil Bit Buggie" Stamp set
I also added lots of fun sequins named "Lilac" also from Craftin Desert Diva's


For the inside of this card I used the same water color technique only this time on regular white card stock which I cut out using a Spellbinders Fleur De Lis Rectangle die.  I added a couple of more sequins and the sentiment  "Just Feel Better" is from a Card Maker Kit.

I am entering into these awesome Challenges:
DL.ART  July Linky Challenge - Anything Goes
Little Scrap Pieces - Show it off Saturday

As always, thanks so much for stopping by to see what I have made.  I love to read your comments so please leave me one.  Thanks, Eva Scraps :)

Tuesday, July 7, 2015

Summer's Bounty watercolor card

hello crafty friends,

Today I decided to work with some water coloring techniques, it was a lot of fun.  To the right side of the card I used a long stamp block that I inked directly with some of my small distress ink pads.  I layed it down ink side up, spritzed with water and layed my cardstock onto it and carefully rubbed the back to soak up a bunch of the ink water.  Then I layed it face up & I took the remaining ink on my block and rubbed it around the other areas of my card.  This one was just with plain ole white card stock.  After letting it dry a bit I decided to spritz the whole card front with perfect pearls mist.  It is so shiny and pretty in person.
The fun puffy Popsicles are stickers from recollections.  The Sun I made from a Spellbinder's Ironwork Accents Die-cut from a bright yellow card stock, I stamped the face using Peachy Keen Stamps Princess faces then chalked the cheeks in an orange glitter chalk.  I then placed the sun back in the die and spritz with perfect pearls mist.  I went around the edge of the inner circle placing dots of pink glitter glue on the sun.  I went around the outer edges with orange ink and bent each one upward a little to give more dimension.

 
The sentiment "Summer's Bounty" is from my stash of scrapbooking stamps I purchased long ago when I first started crafting, I don't know the maker of them.  It is stamped on a fun tag from Craftin Desert Diva's "Short & Sweet Tags" set which I edged in pink and orange inks.  I just love the stamped inner edging.

Entering into these fun challenges:
Jo's Scrap Shack - #95 Anything Goes
Cut it Up Challenge Blog - #74 Stuck On You (Use Sticker & Die-Cut)
DL.ART Linky Party - Anything Goes
Die-Cut-Divas - July 2015 Challenge - Summer & Patriotism


Thanks so much for stopping by to check out my card today, hope you are having a fabulous summer.