Tuesday, August 9, 2011

Cookie Holiday Canister

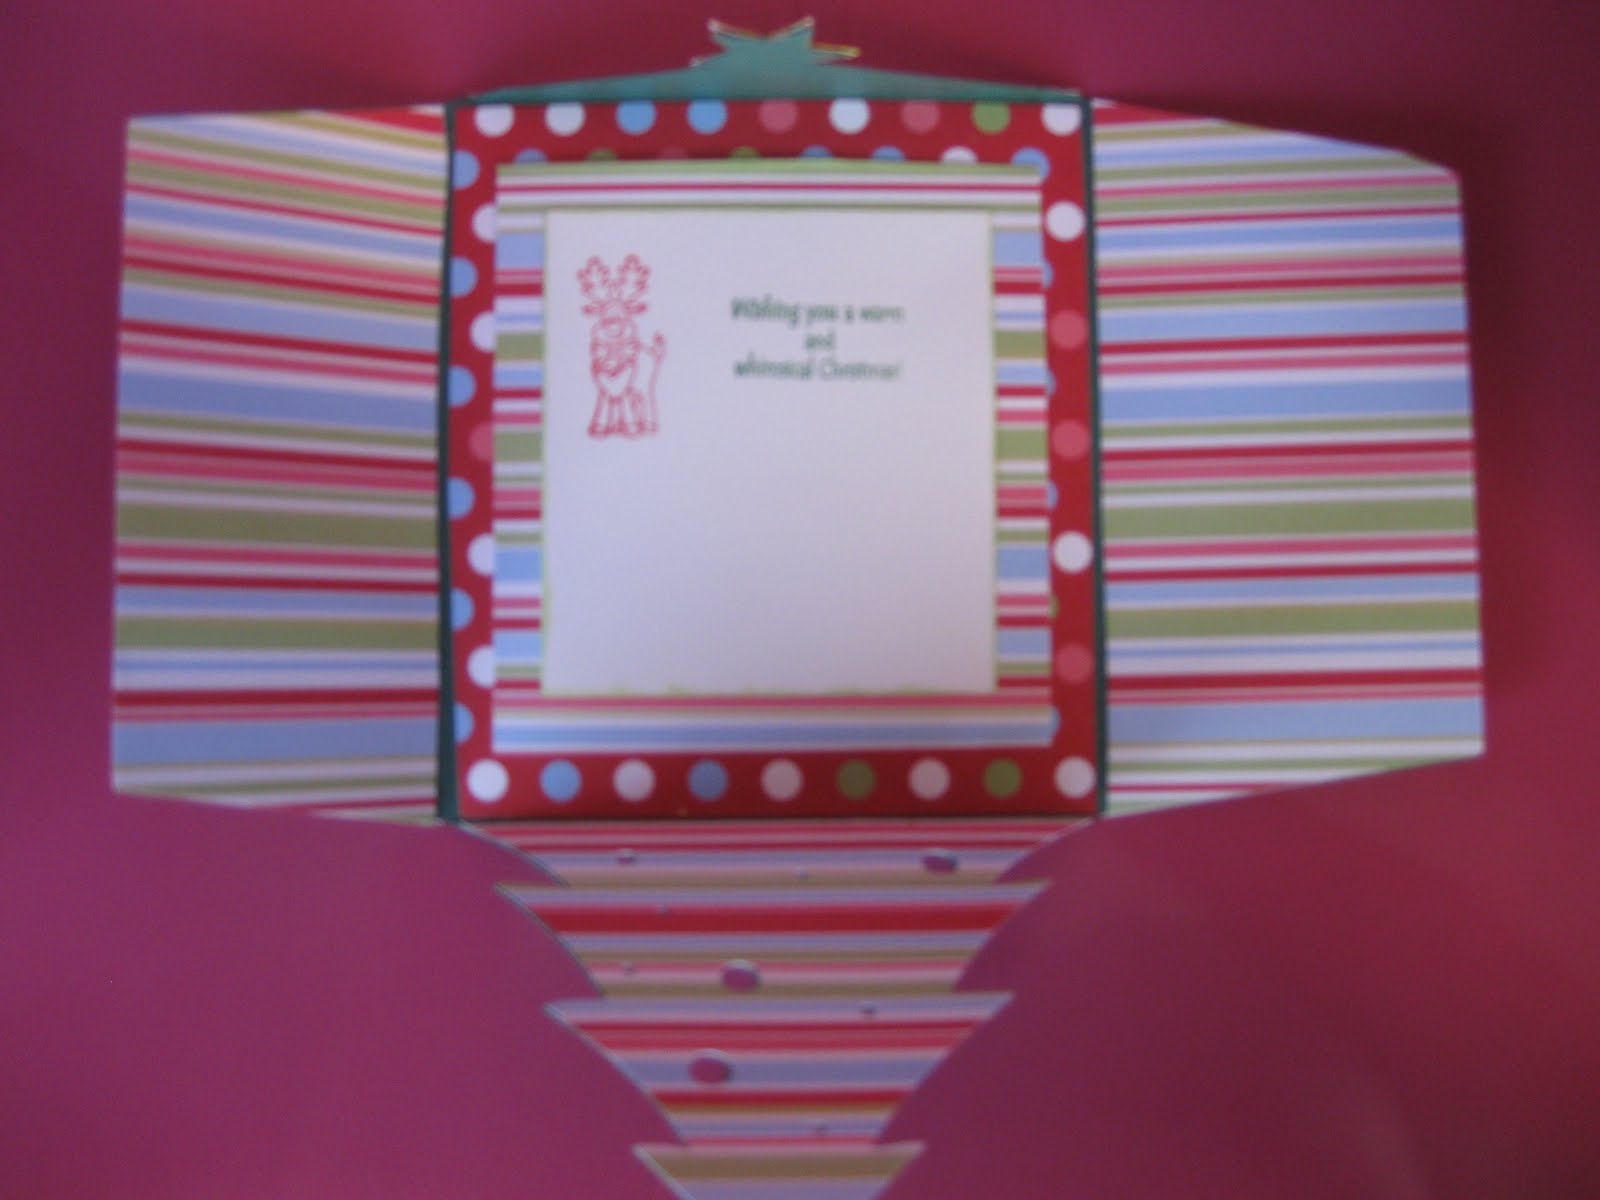
I am stuck on Christmas in July still, lol.
For this little  project I used a Coffee (Folgers) container, I have a bunch
of them saved up and thought it would make a great gift filled with cookies
or muffins or whatever you wanted at Christmas.
Can be reused as a holiday Cookie Jar every year.  I painted the top Red,
it was black.  Would be perfect for a Birthday gift using red, yellow and blue too.
or anything you want.  Ohhh, Valentines Day...I have to see if there are
any files for the gallon sets for Valentines Day!
 Cookie Holiday Gallon Can Cover Set
Closeup of top
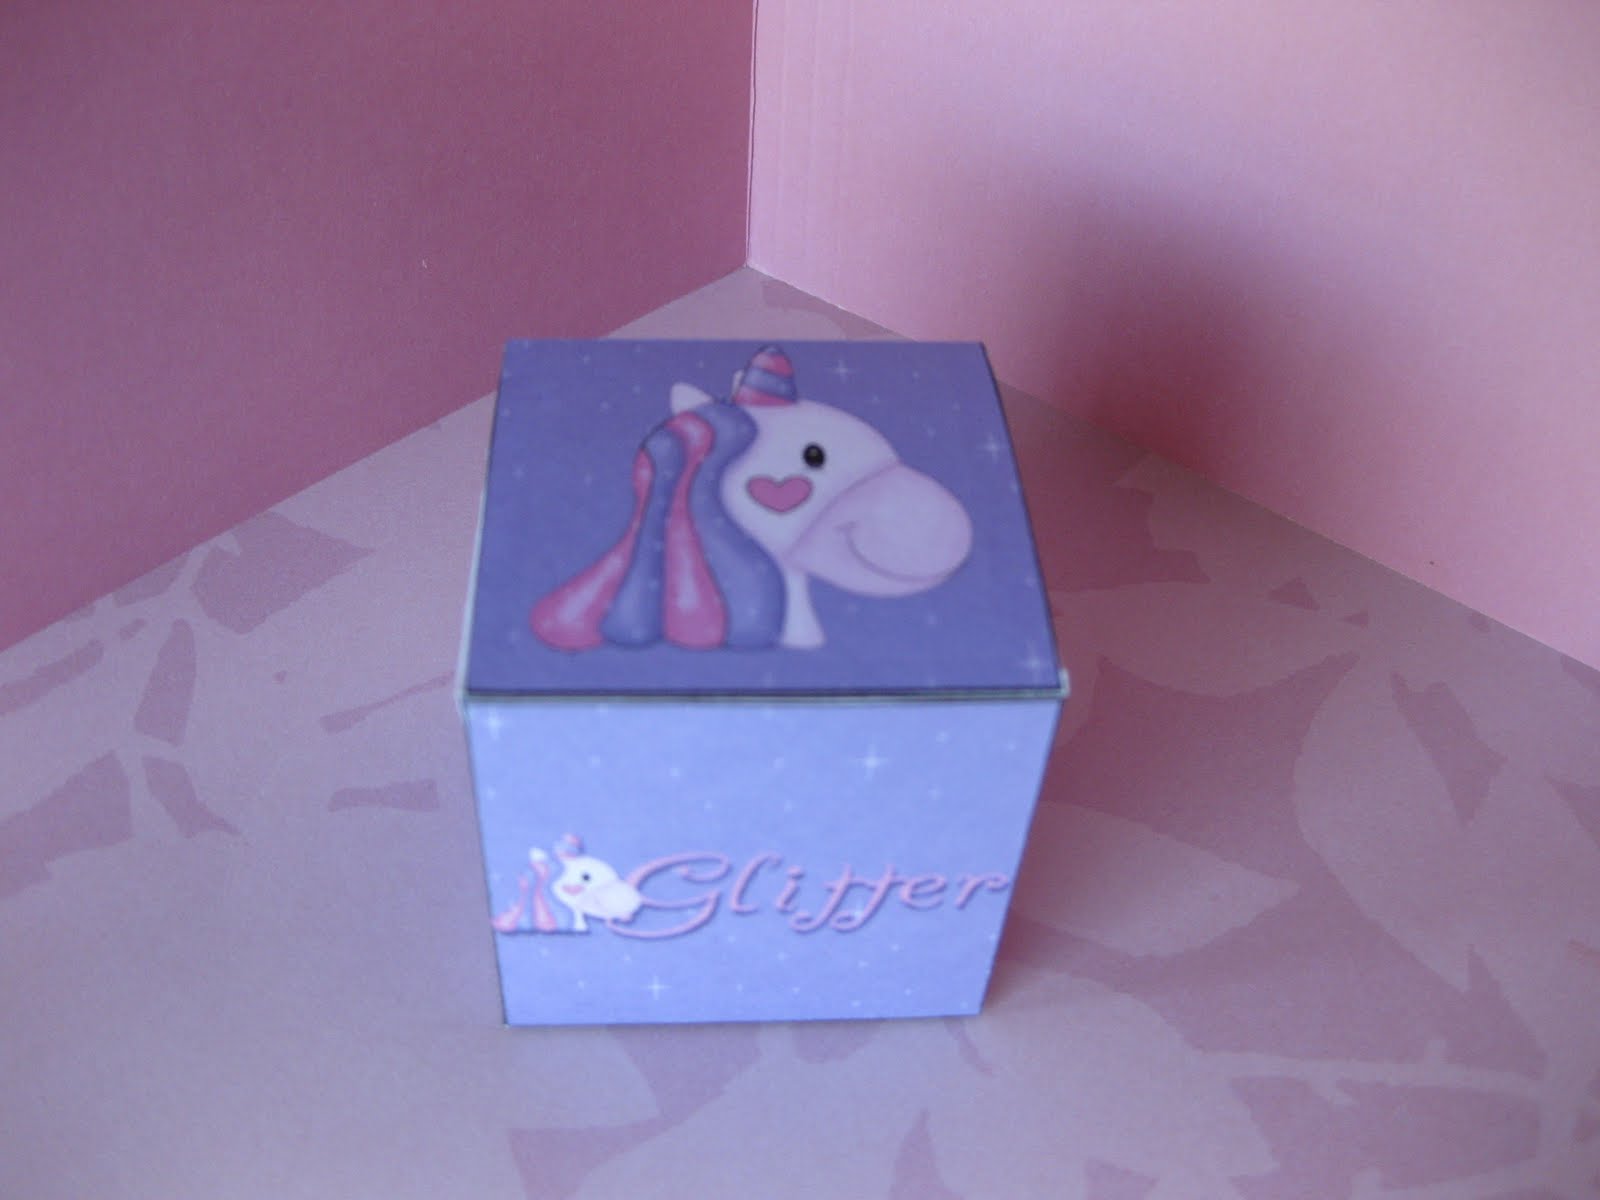
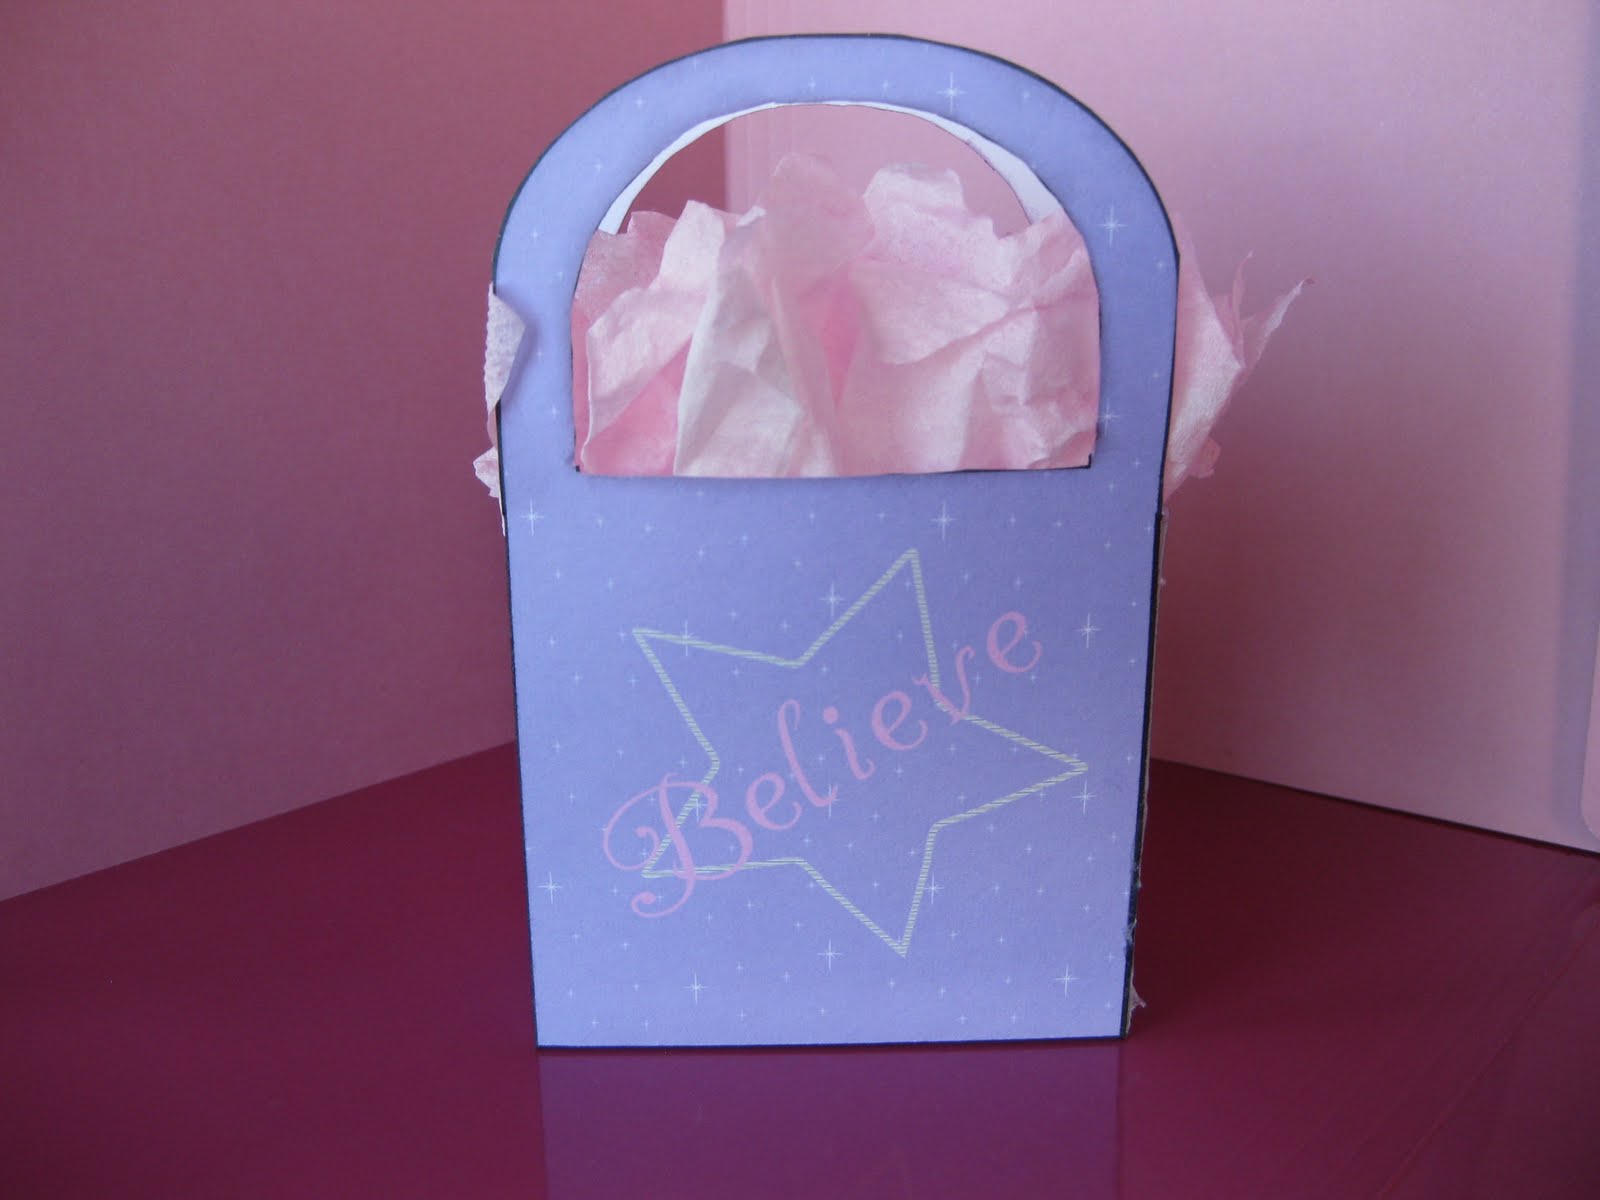
Here is another project I made from a file from My Sweet Tater.
Go check out this and many more of her wonderful files over at Scrappin Hens.
So awesome and easy, just print out on your printer, cut, score and paste, thats it.
It is so easy and you don't have to own a cutting machine to use these.  You
can of course embellish them more if you would like but they really don't need it.

I am linking this project up to:
Show & Tell at Crafting Misfits

Sunday, August 7, 2011

Unicorn Set - My Sweet Tater

Hello my Crafty Friends, I hope you
are all are having a  FABULOUS DAY!

Here is another wonderful set I made from My Sweet Tater files.
What little girl wouldn't love any one of these? or all of them?
Go check out this and many more of her wonderful
files out over at Scrappin Hens.
The Whole Unicorn Set
The Unicorn Square Box

Unicorn Gift Bag - Front & Back
Unicorn Door Hanger - front and back,
this one is perfect for laminating.
Unicorn Octogon Box
Unicorn Sucker Covers

Go check them out over at Scrappin Hens.
So awesome and easy, just print out on your
printer, cut, score and paste, thats it.
It is so easy and you don't have to own
a cutting machine to use these.  You
can of course embellish them more
if you would like but they really don't need it.

Have a Super Crafty Day!
Hugs, Eva :0)

Thursday, August 4, 2011

New Freebie at svgcuts, check it out

I love this one, what a great Autumn kit!!!

You can get this kit for free when you spend less then $10
I can't wait to get this kit for myself, go pick up yours at
(click on the Banner at top of Blog my to go to svgcuts,
then click on their Blog tab to find out more about
how to get this kit for free.)

Back To School Gift Box

I made the little gift Boxes with my Cindy Loo Cart cut at 5 3/4
I designed the label for the box on my Craft Artist program.
I used all of the items from the recent back to school set
that I created using files from My Sweet Tater which you can
find at Scrappin hens.

I added pencils to the pouch and used the
lunch box notes as the gift cards to the kids I rolled up a notebook to add
but the wouldn't fit so they can just sit behind the gift box.  Added some
glue and of course those awesome Book marks I Made from my
My Sweet Tater Files, with my little Apple name tag on there.
If you would like to see any of the Back to school set closer up,
scroll down to my other Back to School posts.
This is two out of the six I am making for the Grand kids. Back
to work I go on the other four...lol.

I hope you all have a wonderful & Crafty Day!!!
Hugs, Eva :0)

Wednesday, August 3, 2011

Pot Full of Flowers Card

Good afternoon my Crafty Friends, I am back with another creation.
This was a card I have been wanting to make for a long time and
I am so glad I finally did.  This is a combination 2 project cut files.
first of all the Flower Pot (which I found in the Dollar Downloads) is from
My Scrap Chick, that file comes with it's own flowers, but I had some other
flowers in mind when I decided to make this card.  These Flowers are from
SVGCUTS (click on the Banner Above to go to their store & blog
where you can find lots of Freebies too) and it is the 3-D Flowers Part II Kit.
Wow these flowers are amazing.  I love the way they turned out.
Mary & Leo's Video guides you through step by step how
to make each flower in the kit.  I chose to use the
Clematis flower for this project and oh how I love this flower.
I am so very happy with this project, combining the two cut file Kits
worked out so well here for me, just like I pictured in my mind.


I am entering this card into these awesome Challenges

Humming Bird Box - My Sweet Tater

Good Morning my crafty friends, I hope you are all having a fantastic week.
Here is another gift box I made from a file from My Sweet Tater.
Go check out this and many more of her wonderful files over at Scrappin Hens.
So awesome and easy, just print out on your printer, cut, score and paste, thats it.
It is so easy and you don't have to own a cutting machine to use these.  You
can of course embellish them more if you would like but they really don't need it.
I just added a ribbon and bow for this one.
 This Box is approx. 3 1/2" x 5" x 1".  I used quick dry glue on this box
but from now on I will use ATG gun because I did not like the way the
glue wet the fibers in the cardstock and made it bow out some.


Have a Wonderful & Crafty Day!

Hugs, Eva :0) 

Tuesday, August 2, 2011

Wild Card - Christmas Tree Card


Sorry the inside is blurry, it say's
"Wishing you a warm and Whimsical Christmas!"
So I decided to make a fold out card instead of the envelope with this one. I like the way it came out…I had to make a little sleeve to slip over it to keep it closed. I cut at 5” I blinged up the tree with some hemp cord and added red stickles to represent lights. I then dotted gold about the tree for decrorations & cut little ¾ light blue ornaments from same page. The papers I used are Green Bazzil & the patterned papers are from a page kit called Winter from Making Memories. The Happy Holidays is a sticker & also the stamps used inside the card are from my CardMaker Kit of the Month Club - Holiday Glitz.  The star I colored yellow and then dusted with gold glitter,
 which now of course is E-V-E-R-Y-W-H-E-R-E!!! lol.
I am entering this over at Cricut Cardz Challenge - #85 Holiday, Anything Goes
& also at Whimsical Wednesday -Fun with Folds
Have a wonderful & Crafty Day!
Hugs, Eva :0)

Monday, August 1, 2011

Cupcake Birthday Card - Swap

I loved the last one I made so much for the blog hop challenge
I decided to make one of my Group Swap cards similar but in Purple.
What a fun card with lots of glittery shimmer.

Recipe:
Cricut Imagine , Better Together - Cup Cake
Cricut Doodlecharms - Candle
Svgcuts - Leisl's Lacey Oval
Card Stock - The Paper Company
Background Paper - Momenta, Birthday Wishes
Background Cut File - Penny Duncan
Other Papers - OTC
Cuttle Bug Folder - D'Vine Swirls
Purple Flowers - OTC
Stamped face - Peachy Keen, cute & Cuddly
Face Colors - Pink & White Gel Pens
Stamped Sentiment & Heart - Footlongs Cupcake set
Inked edges - Lavender Stampabilities Pigment Ink
Bling Red, Gold, Pink Stickles


Sunday, July 31, 2011

Cupcake Birthday Card


Wow I did the Blog Hop this morning over at
Birthday Sundaes...it was so fun and inspiring.
Here is the card I am entering into the  Challenge,
the design team really had some great cards...I couldn't
wait to get busy on my own, now thats a great hop...lol!
I got to use my new Imagine cartridge, Better
together, on my E2.  I loved this cupcake...it's perfect.
I used my cuttlebug D'Vine Swirls folder for the top of the cupcake,
then I went over that with some pink stickles.
I cut the Candle from my new Doodlecharms Cartridge,
I then added some gold stickles to the flame.
The awesome tag & frame are from SVGCUTS, Liesl's Lacy Oval.
You can find their banner above this post, just click on it
to go check out their files...they are all awesome and a bunch
are free.  The sentiment's are from a stamp set by Hampton Art
called Foot longs, this was the cupcake set.  I also used them to stamp cupcakes on the inside.
Also the little red heart stamp is from this same set...I used red ink and then went over it with Red stickles.  The buttons are by Recollections and they are popped up.  I use my new white Gelly roll pen to dot around each scallop on the tag frame.  Oh I also used the red stickels on the cupcake's mouth.  What a fun card!  I think I will make one similar to this for my upcoming card swap.
Recipe:

Cricut Imagine , Better Together - Cup Cake

Cricut Doodlecharms - Candle

Svgcuts - Leisl's Lacey Oval

Card Stock - The Paper Company

Background Paper - OTC

Background Cut File - Penny Duncan

Other Papers - OTC & Pink Bazzil

Cuttle Bug Folder - D'Vine Swirls

Pink Buttons - Recollection's

White dots on Tag - White Gel Pens

Stamped Sentiment & Heart - Footlongs Cupcake set

Inked edges -Tim Holtz Distress Ink, Walnut Stain

Bling Red, Gold, Pink Stickles

Have a wonderful & Crafty rest of your Day!
Hugs, Eva :0)

Saturday, July 30, 2011

Back To School Book Marks

Hello my crafty friends.  Here is the final project for
the Back to School items, Sorry it took me so long.
This is another great file from My Sweet Tater,
please go find her files @ My Scrappin Hens
I recieved my Doodlecharms Cartridge yesterday that
I won from Gigi over at the The Cricut Bug  during the Whimsical
Wednesday blog hop in July...It was awesome. 

So I wanted to add a little charm to these Back to
School Book Marks from my new Doodlecharms Cartridge.
I chose the apple as you can see for my charm.
I added each childs initial on their apple. There is one little girl and the rest are all boys so one got a pink ribbon, this will be her first year of school...awe...Love my Grandbabies.  So for the two
little kids I used the Book Marks with the crayon boxes and for the older two kids I chose to use the book stacks.
I hope they like all of their back to school goodies.
I find this whole set just adorable!
Thanks again MJ for your awesome designs.
before I laminated & added my embellishments
There are two more older boys I am making these for,
I just have to laminte them and I am waiting for other items
to stick in there with them so I don't waste...lol.  Woo Hoo, I got
to use my Your Story Laminator on this project...lol.

If you want to see the other 2 items that match these book marks, please scroll down in my blog to the previous 2 posts. 

Thanks for looking, if you like my blog please feel
free to follow, I love meeting new Crafty Friends.

Have a Wonderful & Crafty Day, Eva :0)