Pages

Friday, December 26, 2014

Happy Birthday to Me Blog Hop


Happy Saturday
and
Welcome to...
My Birthday Celebration!
 
This year I wanted to celebrate my Birthday by sharing a blog hop with you that has some of the best crafters I know.
So, be sure to hop through everyone's blog to see all of the amazing projects that they have made to share with you today.
And don't forget to leave everyone a little bloggie love for your chance at winning some blog candy to give to one lucky person.
Not only am I getting presents today but someone else will as well.  
 
Today's blog candy is the Project Life Theme Kit, Celebrate.
 
 
Now, are you ready to see some amazing projects...
So, sit back, grab yourself a latte, and hop along with us as we celebrate my birthday.
 For my Project today I created a few things for a fun Birthday gift.
The first is a fun treat box... It is a Gable box with a cupcake accent and matching tag. The file is from Creativekuts.com

Easy Bake Ultimate Oven

 I Bought an Easy Bake Oven for my Granddaughter last year so this year I thought it would be fun to make her some homemade mixes for it because the store mixes are very expensive.  After scouring Pinterest and comparing all of the different ideas they had there I came up with this simple recipe by combining several of their ideas together to make her plenty of fun mixes.

I printed out my recipe for her Mom to make her new mixes cheap and easy whenever needed
I added the mix to 10 Baggies after mixing 1/2 with one flavor and 1/2 with the other
I designed some cute toppers on my computer with the name and some cute images for the top label, then I put the instructions on the back that I flipped the text upside down so when they were cut and folded it would be facing the right way.  I then cut them out with my biggest Spellbinder's Label 10 die
I scored a line down the center of each first so I could line up the die easier
I Love How they turned out :)
I got a Monster High Reusable Bag to put everything in to make it her own little Easy Bake Baking kit.  I added 2 tubs of frosting, all 10 of these Mixes plus the recipe card.  I plan on picking up a whisk and some measuring spoons to throw in there too.  I will add an image of the entire kit if I get that done today :)
 
Thank you for stopping by and visiting with us today and helping me to celebrate Robin's birthday.
Your next stop will be with...

Amy E. - http://www.scrapthissavethat.com/

And don't forget to leave everyone some love on their blogs for your chance to win the Project Life Celebrate Theme Kit. 

Here is the line-up for todays hop in case you get lost along the way...

1.  Robin - http://create-a-latte.blogspot.com/


Thanks so much for stopping by, I hope you enjoyed my project.  Please leave me a comment letting me know. 
 
Happy Crafting ~ Eva Scraps
 

Monday, December 8, 2014

Christmas Word Art Tags

I love making hand made tags for gifts :)  these 3 are almost the same.
 

I used a tag from Cricut Very Merry Tags for my base that I stretched to the size I wanted to fit my stamp good.  I then ran it through my Cuttlebug Snowflakes folder and rubbed a light blue ink over it and also inked the edges with same ink.  I also made a topper for each tag cut from some beautiful Blue Iridescent paper (LOVE) I also inked the edges with a darker blue ink.  I used Craftin Desert Divas Simply Holidays Wordart stamp Set for the awesome sentiment.  I First used the free svg file Tara gives with lots of her stamp sets, then I stamped in Black Staz-on ink ...I planned to water color, but changed my mind.  I inked the edges with a darker blue ink.  I then popped it up on foam tap and attached to the tag.  On the tag topper I added some beautiful snowflake swirls cut from a Monster aluminum can using the beautiful snowflake border die from my craft spot.  I snipped of the sections I wanted simply with my scissors and used hot glue to attach.  I added a light blue grosgrain ribbon through the hole in each tag and used a regular stapler to attach it in place.  I then cut a snowflake from one on my www.creativekuts.com files and used some cute face stamps from Peachy Keen - Everyday Character assortment (PK-490)  I used 3 different adorable faces all 1/2" in size.  I used white gel pen for the eyes and some pink chalk for the cheeks.  I used hot glue again to attach these snowflakes to the ribbon hiding the staple.

I am entering in these fun challenges:
Cardz TV - #5 "TAG...YOU'RE IT!"  (3 Tags)
My Craft Spot - #160 - Sentiment as the Focal Point
DL.Art - December Linky Challenge "Anything Goes"
Craftin Desert Divas Craft it up Link it up Party - Christmas


Well that is it for me today, this being my second post in one day lol.  Please leave a comment and have a fun and crafty day ~ Eva Scraps

Penguin Candy Bar Wrapper

The file for this adorable Penguin Candy Bar Wrapper is from Cheryl over at CreativeKuts.com
I used Black heavy card stock for the body/wrapper and flippers.  Some white and orange card stock for the face and some white gel pen doodling.  I used some fun Christmas circles pattern paper for the scarf.  The ornament is an upcycle from a beautiful shiny red Gift bag that has embossed swirls and Merry Christmas on it... the ornament topper is another upcycle  cut from a cleaned Splenda sweetener Bag using the shiny inside which I ran through Cuttlebug folder.  The star is cut from a yellow glitter paper and the adorable Merry Christmas Stamp at the bottom is from Craftin Desert Diva's "Happy Celebrations" Set which I heat embossed with white embossing powder.  Oh yeah and it holds a standard size Hershey's Bar inside :)

I am entering into these fun challenges:
Craftin Desert Diva's - Christmas Linky Party
DL.ART - Thankful Thursday Any Winter Holiday

I hope you enjoyed my project today, thanks for stopping by... don't forget to leave me a comment, I love reading those :) 
Happy Crafting ~ Eva Scraps

Sunday, December 7, 2014

Star Masuline Birthday Card

 
Using some Brown Card stock as my base I layered some pattern paper ful of small green stars that I ran through my Cuttlebug Simply charmed set -squares.  I added two double layered square panels with the top in Kraft Card stock that I ran through my CB Stars folder.  Then I added a double layer Oval with green dotted paper on top that is popped up on foam squares.  I cut 3 different sized stars from Cricut County fair cart the big one is in a wood look paper the bottom 2 are popped up on foam... one of them in a green pattern paper and one in Kraft card stock that I again ran through my stars CB folder.  I used some puffy paint for the dot accents at each corner.  The adorable Happy Birthday Stamp is from Craftin Desert Diva's - "Happy Celebrations"
 
 
The inside I used some of the matching paper to accent at the top and used several different stamps from my stash I love all of these fun different star stamps.
 
I also cut a box to hold the gift using an SVG from Heather I think.  and I cut a tag from Very Merry Tags making a second top layer that I cut out a star and slipped some of the same matching pattern paper under to bring it all together.  Same cute stamp "Happy Birthday" from CDD.  I dotted and dashed around the star with Green and white gel pen.
 
I am entering my project in these fun challenges:
 
Thanks so much for stopping by today, hope you liked my project. ~ Eva Scraps

Wednesday, December 3, 2014

Penguin Shaker Tag/Ornament

I made this adorable Penguin Shaker Ornament from Created Kuts which can also be used as a tag.  I decided to add the name of my Grandson instead of the adorable original way with the word believe.  This is my very first shaker project of any sort, it was easy and fun.


I used some adorable Peachy Keen Faces for not only the adorable penguin which I used PK-521 Winter Faces 1 1/8" that I colored in and chalked the cheeks  but also PK-490 1/2" everyday character faces for the snowflakes X 3 with cheeks again chalked and white gel pen for eyes.  I inked all of the snowflakes with some cats eye blue ink. The 4th snowflake I used my Cri-Kits green gel pen to write out 2014... it wasn't showing up enough so I went back over it in black gel pen by hand.  Also on the penguin... I added green glitter to the ear muffs.  Inside the shaker I add chunky white glitter with a few sequins scattered through and a touch of the fine green glitter that I used on ear muffs.  I embossed green frame with my Cuttlebug Snowflakes folder.  I used some 1/8" Blue Offray ribbon for the hanger and I also strung some through the bottom and attached a back snowflake then foam tape, then ribbon end then another piece of foam tape then the snowflake with the adorable PK face showing for both ribbon ends.  I then took a Blue star button and threaded a piece green and white bakers twine through the button attaching and tying it to the blue offray ribbon.

I am entering in these fun challenges:
Simon Says Stamp - Christmas/Holidays
Hiding in my Craft Room - #176 Freestyle
Little Scrap Pieces - Show it Off Saturday Linky Party
Craftin Desert Diva's - #45 Christmas Linky Party 12/21
DL.ART - December Linky Party - Anything Goes


For my very first shaker project... I am impressed and plan to make more in a different style for the other 2 kids.

Wednesday, November 19, 2014

Gingerbread Girl Easel Card

This Easel card base was one I got from Shirleys Designs
 
I had to make one more card with this adorable Peachy Keen Stamp that I have Paper Pieced the Dress, Collar and the bows.  I stamped the entire body on white then rubbed it all over with  chalk to get her color.  The frosting hair and frosting squiggles are filled in with shiny purple puffy paint and the nose with pink puffy paint.  Cheeks are blushed with pink chalk with 3 dots of white gel pen on each and eyes are colored in with white gel Pen as well. And the white collar piece I used a almost pink puffy paint then sprinkled with pink glitter.
I cut the Tag from Cricut Very Merry Tags out of Kraft Cardstock, it is popped up on Foam squares to act as the holder when the card is open.  I used a white gel pen to dash around the edges and stamped with pink snowflakes.  I added coordinating colors of jute cord.  The sentiment Stamp is from Desert Craftin Diva's - "Happy Holidays" from Happy Celebrations Stamp set.  I also added a Pink Snowflake from My Craft Spot Die cut with pink bling in the center.  All of my layers are inked with Tim Holtz Walnut Distress ink.

I am entering in these fun challenges:

Desert Craftin Diva's - Linky Party - Create or Use a Tag 11/24


Thanks for stopping by to see my latest Project :)
 
Happy Crafting ~ Eva Scraps

Tuesday, November 18, 2014

Gingerbread Cutie Center Step Card

So of course as you can see... this entire card was centered around my new adorable Peachy Keen Gingerbread Dolls - Large Stamp (PK-417)  that I recently ordered.  I stamped her on Kraft cardstock and cut her out.  I then paper pieced her... I stamped certain sections again like the dress area on the purple Polk a dot paper... the frosting hair on pink and then again on purple so I could cut out the bows and even the collar area in white.  I am not much of a hand cutting person but paper piecing this little cutie was so worth it :) I used a white almost clear puffy paint for the collar then sprinkled it with white glitter.  I also used pink puffy paint for her frosting squiggles, Pink gel pen for nose, white gel pen for eyes and cheek dots and a little pink chalk to rosy up those cheeks.

The card itself is a center step card I created myself, I also created the pink and purple bottom layers in Scal 2 then ran them through my Snowflake embossing folder.  The Beautiful Oval Behind her is from Spellbinders Opulent Ovals, The fancy border under the Baubles is from Spellbinders Frosty Forms.  The  Snowflakes are from My Craft spot Snowflake Border metal dies, Bauble ornaments are from Cricut Very Merry Tags, front Merry Christmas sentiment stamped on a Spellbinders Banner Die is from Craftin Desert Diva's called Happy Celebrations.


inside stamps are from Cardmaker and I tried to coordinate the inks with colors I used on the front of the card.  "May Magical Moments and Happy Memories Surround You With Joy this Christmas"  I just love that awesome sentiment.  Oh and all of my piecing's including the inside mat are all inked up with Tim Holtz Walnut Stain Distress ink.  Also I added some bling to the bauble ornaments and the snowflakes.

I am entering in these fun challenges:
Bitten by the Bug 2 - Anything Goes - 11/23
Jo's Scrap Shack - Anything Goes - 11/21
D.L. Art - #144 Anything Christmas - 11/25
Die Cut Diva's - Any Holiday - 12/1

Thanks for stopping by to have a look at my latest project... Hope to see you again soon!
Have a Happy Crafty Day,
~ Eva Scraps

Sunday, November 16, 2014

3 Dimensional Fun Thanksgiving Frame

This was so much fun to make and will house a Beautiful Photo of my Grand Kids when they come for Thanksgiving in a couple of weeks!  I will hang this in my dining Room for a little fall Décor this year and every year after :)  Let me apologize for the reflection on the glass, this was almost impossible to get a decent picture of... UGH!!!

I used an 11X14 Frame with some fun Fall Paper out of an extra large Heidi Grace Paper Pad that is 12X18 inches cut to fit as the Background.  
The adorable Turkey in the pot is from Treasure Box Designs called I'm Cooked.  I splattered the pot with white paint (what a mess but like the outcome)  I placed all of the tail feathers how I wanted them and then placed some scotch tape on the back to keep them positioned and ran them through my Cuttlebug Swirls Folder.  For his sign I used my Cricut Brown marker pen to spell out YIKES! then went over it dashed style in white Gel Pen, I ran the sign through Cuttlebug Forest Branches sideways to give it a wood look and on his wings to give them a textured look.  Also used my white gel pen to accent the eyes.  For the fire and wood under the pot I used cuts from Cricut Potpourri Basket Cartridge.  I had to do some customizing and cutting to get the fire out in front of the pot.  Still thinking I may play with and fix that better still :) 
For the Brown Frame mat I used one of my Martha Stewart Punch Around the page sets, Optic Dots.  then I cut a piece of Orange Recollection's cardstock and the a piece of Fall Words Pattern Paper from DCWV The Halloween and Fall Stack to fit the Frame.

The Adorable Squirrel And Acorn Nuts are from Too Cute by Jessica, Nutty For Fall.
I used my Cuttlebug Simply Charmed Squares Folder for embossing the Acorn Tops.  I used my white gel pen to accent the eyes and nose on the adorable squirrel.  I also blushed his cheeks lightly with a peach colored chalk and added 3 whisker dots to each cheek with a brown colored pencil.  I wrapped a light colored sheer ribbon at the top of my frame tied in a simple knot and added some raffia to give a fall look.  I wanted to add a button in the center but did not think the glass would allow for that.  I placed all of that inside the frame and closed it up, but first slid my wide brown ribbon under the glass and again tied a simply knot in the center.  I took a piece of fun shiny orange ribbon and tied it around the brown knot with tails going in opposite direction.  Took some more raffia and cut it into sprigs and added that to the front of my ribbon knots with some Brown and white Bakers Twine.  I used the same twine to hang my adorable tag from.  The Orange tag is a cut from Cricut Very Merry Tags, I added that custom topper I made myself in brown that I also ran through the CB Simply Squared Embossing folder to match with the acorns.
 

The awesome Sentiment stamp is from Craftin Desert Divas called Simply Holiday's Word Art... I love this set and just received it yesterday :)  Plus I got the Free SVG background layer for the stamp from CDD on FB too.  What a fabulous touch it gives and I was able to pop it up on Foam dots to give such dimension.  I used my water color pencils to color in some things on the stamped image and then used my water brush pen to blend it together a bit.  Oh back up the bow that sticks out, I used a spellbinder's die for the pretty medallion then I added a beautiful Pumpkin I cut from Cricut Thanksgiving Cartridge

I am entering this project into these fun Challenges
Craftin Desert Divas Linky Party - # 44 Create or use Tag on Project 11/23
Bitten By the Bug 2 - Fall Pumpkin Challenge 11/16
Die Cuttin Diva's - #91 Lets Talk Turkey 11/16
Scrappy Moms - Terrific Tuesday Challenge Let's Go Nuts 11/17
Decorate to Celebrate - #88 Anything Goes 11/25
Cut It Up Challenge -  #58 Let's Talk Turkey  11/26
Jo's Scrap Shack - #66 Anything Goes 11/21
Hiding in My Craft Room - #174 Think Fall 11/21
Little Scrap Pieces - Show it Off Saturday Linky Party 11/21
My Sheri Crafts - #146 Turkey Time 11/21
Die Cut Divas - Any Holiday 12/1
PDE Linky Party - Pilgrims, Indians, Turkey's or Scarecrows 11/24

Thanks so much for stopping by my little Crafty corner of the Web to check out my Project.  Have a wonderful and Crafty Day!  ~ Eva


Monday, November 10, 2014

Gift Box with tag and metal snowflake

So I have been so busy this week but trying to get this fun gift box made for the Challenge over at My Craft Spot from last week.... I think I am just making it under the wire as they already started their new challenge this week.  Last month I bought this awesome gift box svg from My Craft Spot after viewing all of the wonderful DT projects in the sneak peeks and blog hop (I fell in LOVE).  I wanted to use it in this fun use something metal challenge and here is what I came up with.

 I made the gift box and added dotted lines at the fold lines since I don't have a score tool on my machine.  I absolutely adore this little gift box... It can be used for so much more than just Christmas too.
 The tag came in the same cut file also with the Gift box and so does that beautiful bow on top.  I used one of my fun Tiny Tags Christmas Stamp Set for the December 25 stamped in versamark and then heat embossed in white.  That is also a My Craft Spot Product as well as the awesome snowflake I used from the Snowflake Border Metal die set I got last year from My Craft Spot.  I cut the snowflake out of a Monster Can ( I cut the actual snowflake border out too but have not used it yet) I used the shiny metal side for the front and decided to color it in with a purple sharpie.  I then added it to the fun tag and there you go... what an adorable gift box for some lucky person :)
Here is a view of how I attached the bow to the top of the box with a purple metal brad.

Here is the awesome snowflake Border from that set that I plan to use on something very soon and a few more of the single flakes that I did some coloring on.  the bottom one shows the back  with the monster can label view :)

I am entering in these fun Challenges:
My Craft Spot - #156 Metal

Thanks for stopping by, I hope you enjoyed my project.
Happy Crafting Eva Scraps

Wednesday, November 5, 2014

Fall Place Cards / Nugget Holders

This was a fun project and a great asset to not only let my guests know where to sit at the thanksgiving Day Dinner table, but also gives them a little treat for after the feast.  I designed the nugget holder myself in Scal 2.


I also used Gypsy wanderings for the cute leaf on each and then stamped them with cute peachy keen faces and one of them is a Treasure Box face stamp (the green one on the far left).  Each holder itself is embossed with CB swirls I also added a fun orange fancy spellbinders cut from ironworks accents around the hole before I added the ribbon...what a nice touch it added.  Each holder has two tags attached with a brad.  The mini tag has either a stamped "for you" or a cricut cut "for you" cut from Cricut Alphabet Cartridge.  The bigger tag is embossed with CB squares folder from the simply charmed set with the stamped leaf popped up on foam tape on top of that tag.  Each one has a hand written name tag tucked in behind the tags mad from Spellbinders ribbon banners die.  Inside each place card is a yummy Snickers peanut butter squared.

I am entering this project into these fun Challenges:
Cardz TV Stamps - #3 "All in our Places" - place cards
Cut it up challenge - #57 Tags Tags Tags
Little Scrap Pieces - Show it Off Saturday Linky party


If you look closely in the center vase/candle holder in the background you will see a past creations of cute little Turkeys with real feathers inside to make a fun decor piece for the center of the table.
 Thanks for stopping by, I hope you enjoyed my fun Fall project :)
Happy Crafting, Eva Scraps

Tuesday, November 4, 2014

Thankful For You Leaf Card

Thankful For You fun Fall Center Step card.

I used several Cricut Cartridges for this one. The back leaves cut from CM Cheerful Seasons the front Leaf from Gypsy Wanderings, which I stamped the with Peachy Keen wide eyed kids face stamp. "Thankful" also from CM Cheerful Seasons... "For You" is from Cricut Alphabet.  plus a spellbinders Moroccan Accents die for that fancy edge on either side of the main center section.  Some cuttlebug embossing done, birds and swirls on side orange pieces and Anna griffin border from Climbing Rose set on bottom orange piece.  That Gorgeous brown pattern paper is like a raised velvet pattern... It is fabulous in person! On the side sections I placed Metal Brown Flower Brad Buddies with an orange flower brad in the center of each.  I tied a pretty gold cord around card with a brown button attached but it was missing something so I added a bushel of raffia behind that. 

I am entering into these fun challenges:
Peachy Keen Stamps - Thankful Theme
Lil Red Wagon - Krafty  used Kraft paper on Center leaf and fancy edges
Hiding in My Craft Room - Fall Colors
Craftin' Desert Diva's - Brown & Orange
Fantabulous Cricut - Anything Goes
Simon Says Stamp - Anything Goes

Thanks so much for stopping by today, I hope you enjoyed my project... I sure enjoyed making it :)

Happy Crafting, Eva Scraps


Monday, November 3, 2014

Creepy Spider Halloween Card

So I really Challenged myself for this card using only Manual Die cuts or pieces of them.

Card is a 5 X 5
Paper - DCWV Eek-a-Boo Stack
Purple Fancy Corners X 4 - Spellbinders Fantastic Flourish 2
Spider Build
Top is a popped up Paper Artist Scallop Circle
Stamped with Peachy Keen Fall Face Parts Med
Heat Embossed with Silver Tinsel
Gel pens for eyes and mouth
Bottom is 2 Paper Artist Circle Die (legs in Between)
Legs are from Spellbinders Fleur de lis Doily accents the fancy corners times 4
I cut the two ends of each swirly corner and used for legs
then used what was left for corner accents
Sentiment is Stamped with Peachy Keen Fall Face Parts Med
and heat embossed white
Small hand tied purple bow adhered to top with a Zot

I am entering into these fun challenges:
Cuttlebug Mania - Itsy Bitsy Spider with manual die cuts only - No Electric 11/10
Die Cut Diva's - Any Holiday 12/1
My Sheri Crafts - #145 Black Magic Halloween 11/6
Jo's Scrap Shack - Happy Halloween 11/7
Scrappy Mom's - Happy Halloween 11/3

Thanks for stopping by to see my Project.

Happy Crafting, Eva Scraps

Sunday, November 2, 2014

Harvest Flower Gift Box

A cute little treat box for some Fall goodies.

I used the Flower top box from Cricut Tags Bags Boxes and more cut in Kraft card stock for the box.  I made a simple wrapper for it in some pretty fall stripe paper.  I cut the Harvest from the Cricut CM Cheerful Seasons.

I cut this awesome flower from Cricut Bloom cartridge and curled up the petals to give it some definition and only attached it to one half of the flower top box so you can still get inside to the treats.

I am entering into these fun challenges:
Bitten By the Bug 2 - Cricut Gift Box Challenge
Hiding in my Craft Room - Fall Colors
Die Cut Divas - Any Holiday with Die cut

Thanks for stopping by to see yet another of my fun creations. 
Happy Crafting ~ Eva Scraps

Happy Fall Y'all Scarecrow Center Step Card

I started this card thinking of the basic plan and then just kept digging out cartridges to add details lol.


Center step card - SVG Attic
Scarecrow and tiny crows and grass - Cricut CM seasons
Sign - Cricut Pooh and Friends
Corn Stalks, big crows, center pumpkins - Cricut Simply Scarecrow
Front 2 Pumpkins - Creative Kuts

Embossing
Cuttlebug D'Vine Swirls
Cuttlebug Forest Branches

Peachy Keen Sweet on you Face Stamps
White gelly roll pen
Pink chalk cheeks
Purple chalk girl eyelids
Blue paint eyes

I am entering this card into these fun Challenges:

Craftin' Desert Diva's - Brown & Orange 11/9
Hiding in My Craft Room - Fall Colors  11/8
Lil red Wagon - Kraft Paper  Kraft Paper on Sign and Corn Stalks 11/5
Die Cut Diva's - Holiday plus Die Cut  12/1


Thanks so much for stopping by, be sure to leave me a comment before you go.
Happy Crafting,
Eva Scraps


Friday, October 31, 2014

Kitty Witch Lantern or Candy Dish

Happy Halloween to you all... I wanted to share one more Spooky cute project with you.

This is just like my snowman lanterns with a different theme lol.

The Hat is from SVG CUTS that I added the tulle and ribbon slide to accent... and that beautiful Flower is from Cricut Bloom cart... I used parts of Flower 9 and 10 and added a fun cloth brad that was black and white but I colored to purple with a sharpie :) Oh and the ears are added to the hat as well ... the eyes are vinyl, I had cut all of the face pieces with vinyl but it would not lay right on the curved dish so I switched gears and did it in cardstock for the white cheeks part and adhered the vinyl nose and tongue to it and popped up the whole thing.  I added some tulle as a cape and a ribbon to tie it with.

I wish I could find one of my battery lights to show it lit up :(  I have looked everywhere!  Well apparently not everywhere... lol... everywhere except where I hid them from myself... lmbo!!!

I am entering into these fun Challenges:
Fantabulous Cricut Challenge - #243 Halloween ( I used Bloom Cartridge for flower) 11/2
Die Cuttin' Diva's - Happy Halloween 11/3
Hiding in My Craft Room - Any Holiday 11/1
Little Scrap pieces - Show it Off Saturday Linky party 11/1
Scrappy Mom's Stamps - Terrific Tuesday Challenge - Happy Halloween 11/3

Thanks so much for stopping by to see my project, I would love for you to leave me a comment about it.

Have a Happy and safe Halloween!  and as always... Happy Crafting!  Eva Scraps

Tuesday, October 28, 2014

Deputy Snowman Card

I just recently received the Cutie Patootie Stamp set from Peachy keen Stamps and knew I had to make a Christmas card with him as soon as I saw him!


So as I said the little deputy snowman is from Peachy Keen Stamps I also added the lasso and star badge from Cricut Old West Cart... The lasso and rope are two separate cuts plus I cut a second lasso to clip and fit it all together. I ran both of the layers of the Star/Badge through a snowflake embossing folder to make it a Badge fit for this snowman tee hee and pop dotted up the top of the star/Badge! I used my gel pens and watercolor pencils and water brush to color him in and I used some fabulous handmade paper from my stash that I only ever dig out for very special cards :) I am such a paper hoarder lol!

For the inside I added a layer of white paper that I inked up edges with Tim Holts Walnut stain Distress ink.  I added a strip of the same Handmade paper from the front and added a Merry Christmas stamp in Brown ink and a cute little Christmas tree down in the corner lightly inked in green.

I am entering into these fun challenges:
Hiding in My Craft Room - #171 Any Holiday 10/31


Thanks for stopping by today, I hope you have time to leave me a comment :)

Happy Crafting, Eva Scraps

Friday, October 24, 2014

Disney Blog Hop for Rett Syndrome Awareness


Happy Saturday
and 
Welcome to this year's Blog Hop for...
 
Rett Syndrome Awareness
 
In this hop we will be showing you many Disney themed projects while sharing with you about
Rett Syndrome.
If you have just stopped by my blog to visit with me, thank you and welcome, but please start at the beginning of the hop with our
Hostess, Robin from
Create-A-Latte.
We would not want you to miss any of these wonderful projects.

So, grab yourself a Latte', sit back and hop along with us as we share our projects with you.
 
 October is Rett Syndrome Awareness Month, so I wanted to help get the word out and what better way to do that than with a blog hop.
  
Rett Syndrome strikes without warning. A girl with Rett Syndrome usually starts out as a happy and healthy baby. Then something goes terribly wrong. She loses the ability to speak, she can't use her hands to play with toys, or to even feed herself, and she may lose the ability to walk. 
Despite their physical disabilities, girls with Rett Syndrome are believed to be functioning mentally at a much higher level than previously thought.   
Rett Syndrome is caused by a mutation of the MECP2  gene on the X chromosome.  
Rett Syndrome is found in all racial and ethnic groups throughout the world, and in every socioeconomic class.  
Rett  Syndrome affects in 15,000 female births.  

*Symptoms of Rett Syndrome...

Rett Syndrome is a genetic neurological disorder that affects girls between 6 and 18 months of age. This regressive disease leads to lifelong handicaps, including loss of speech and voluntary muscle control, and is often misdiagnosed as Cerebral Palsy or Autism. Symptoms range from mild to severe, and almost always include...
*Developmental Regression or Plateau
*Near constant hand clasping or wringing
*Severe communication impairment
*Breathing problems
*Digestive issues
*Floppy arms and legs
*If able to walk, then with a shaky, unsteady gait, or toe-walking. But most do end up using a wheelchair for the most part.
*Scoliosis
*Seizures
*Slowing head growth
*Abnormal sleep patterns
*Transient loss of social engagement
*Poor circulation that can lead to cold and bluish arms and legs
*Anxiety
  
Many individuals with Rett Syndrome live well into adulthood, although there are some that do not get that chance and end up losing their battle to Rett Syndrome at a very early age.
Most people including Doctors are not aware of Rett Syndrome, so, please help me get the word out about Rett Syndrome and hopefully the more that know the faster we can help in finding a cure.

For more information you can visit...
http://www.rettsyndrome.org/

Now, are you ready for some blog candy???  We have a several wonderful and generous sponsors today...


1.  Lucy Kelleher
with Close to My Heart
$10 gift certificate for Close to My Heart products with Lucy 

Close To My Heart


2.  Dee's Delights Store
$20 Gift Certificate for Dee's Store


3. Heather Stafford with...
Gemini Red Creations
A floating locket and your choice of two floating charms 


http://www.geminiredcreations.com/shop/floating-lockets/
 

4.  Diana Larson with
DLART
$10 Gift Certificate for DLART Store

https://www.etsy.com/shop/DLART

5.  Robin Lane with
Create-A-Latte
A Collection of Snap Products by Simple Stories. Everything you need to put together your Disney memories.
The kit comes with an Album, a pack of Insta Pocket Pages, "Say Cheese" Journal Kit, and the "Say Cheese" Snap Pack.


Without further ado...Our Disney Projects.

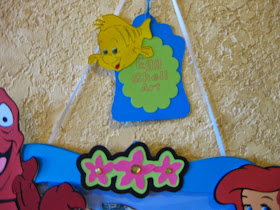
For My Project I have created a fun Disney themed Frame with Ariel and Sebastian from My Little Mermaid.  Love that Movie!!!  Now what is housed inside the frame is a fun Egg Shell Art I created with my Grand Daughter earlier this year.
 
 
Okay where to start :)  I guess the inside:  Flounder was a coloring book page free printable from Disney.  I printed out colored in his eyes and mouth only... then my Grand Daughter Ashlyn and I took several cracked in half egg shells cleaned and had a blast coloring the egg shells in dye, just like Easter eggs only the broken in half shells only.  We did Yellow, a light blue and a dark blue.  We let them dry over night then put them in baggies and crushed the shells into crumbles.  Then we used a paint brush and brushed the certain parts with glue and sprinkled the correct colors into place. 
Close up of the egg shells on Flounder
 This was a great project that I did with my own Daughter when she was little... in fact it was flounder then too but from one of her coloring books I think.  She is trying to find hers so we can make a matching frame to put next to this one :)
For all of the character cuts and flowers I used the Cricut - Dreams Come True Cartridge
 
I think I cut Ariel at 10 1/2" I added some Purple Glitter to her Top and Bright Green Glitter to her Tail Fin... I also embossed her Tail with Cuttlebug Simply Charmed set - Squares.
Sebastian the Crab I cut at 6 3/4
 
The Sea Floral corner I cut at 5 3/4" I added drops of tulip translucent fabric paint in flower centers and sprinkled with fine yellow glitter... inside the frame I added a seaweed cut at 3" and its corresponding flowers, some in pink and some yellow.  for the centers I added either pink or yellow dabs.
 I created this flower cluster for the top myself by welding together and creating a couple of shadow layers for the pretty pink flowers to go on... I added some pretty yellow bling to the centers.  Above that I created a tag to hang with this frame.  The Tag and Layer were cut from Cricut Artiste at 3 1/2".  Again I used Dreams Come True Cartridge  For flounder cut at 2" the top drawing layer and the lettering I used my cricut gel pens for.  I colored in his mouth and eyes by hand with gel pens.
the tag says that Ashlyn and I created this one and hopefully I can get the one from my Daughter from like 1994 if she can find it and we can frame it to hang next to this one with a tag labeling ours :)
 
Thanks for stopping by to see my creation, Please leave me some bloggy love, I enjoy reading each of your comments... Enjoy the rest of the hop!!!


Be sure to head on over to....

Annemarie's Art 

for your next stop and see her wonderful project that she has made to share with you today.

If you get lost along the way here is the entire line up for today's Blog Hop.
 
1. Robin L. ~  http://create-a-latte.blogspot.com/
 

Thank you for hopping along with us today, I hope that you have learned something about Rett Syndrome and that you will help spread the word so that we can make as many people aware of this as possible. I also hope that we have inspired you to get your craft on.